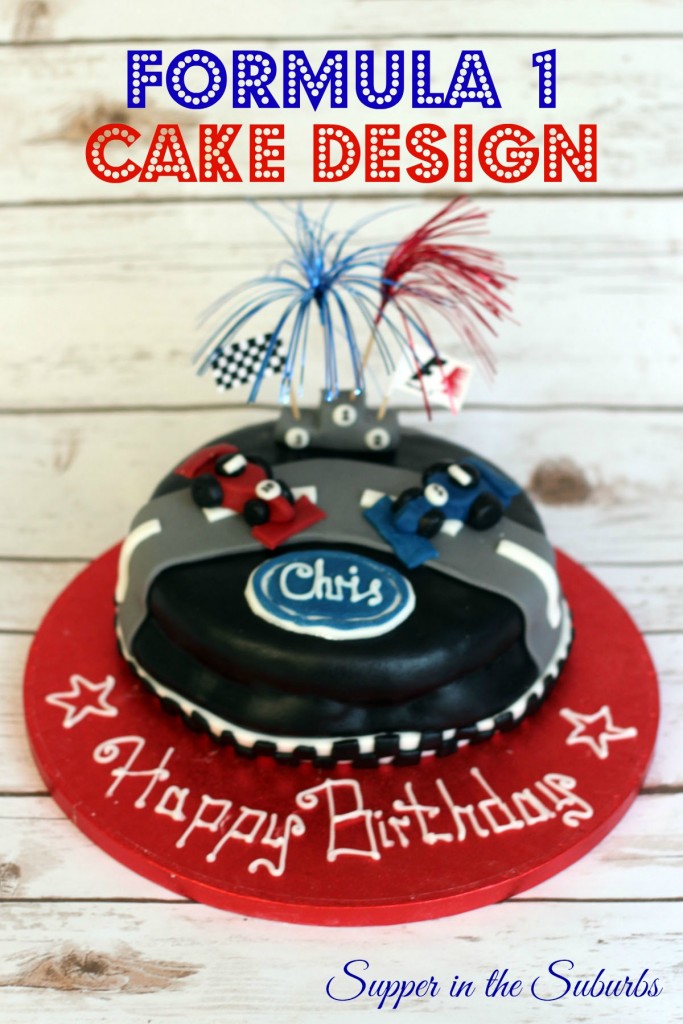
Last Saturday was the 30th birthday of Chris, my sister's boyfriend. He is a huge petrol head and for his birthday we all chipped in for him to go to Silverstone. When my sister asked me to bake him a cake I knew I had to bake him a Formula 1 themed cake!
I scoured Pinterest and Google looking for racing car cakes, formula 1 cakes, and other car themed cake designs. There were a few out there but the overwhelming majority were 3D car cakes like this one or Disney Cars themed cakes like this one. A 3D cake was just too ambitious for making in the few hours I had after work, and I don't think a Disney cake would have gone down too well...
I finally found a few ideas that I liked and came up with my design. It was going to take an awful lot of black fondant but I really wanted to make something special.
How to make a Formula 1 themed cake
So how did I do it?
Formula 1 Cake Design
Equipment
- Small circular cutter
- Small sharp knife
- 12 inch cake board
- 2 toothpicks
- 1 sheet paper
- Black and red pens
Ingredients
- 1 victoria sponge cake 2 layers of sponge
- 400 g buttercream
- 200 g strawberry jam
- 500 g black fondant
- 150 g grey fondant
- 100 g white fondant
- 75 g red fondant
- 100 g blue fondant
- White writing icing
- Black edible marker
- Edible glue
Instructions
- Stick the bottom layer of your sponge cake to the cake board with a blob of butter cream.
- Layer the two sponges together with a layer of buttercream then a layer of jam.
- Cover the whole cake with the remaining buttercream and place to one side.
- Pinch an amount of black fondant roughly the size of two golf balls and place to one side.
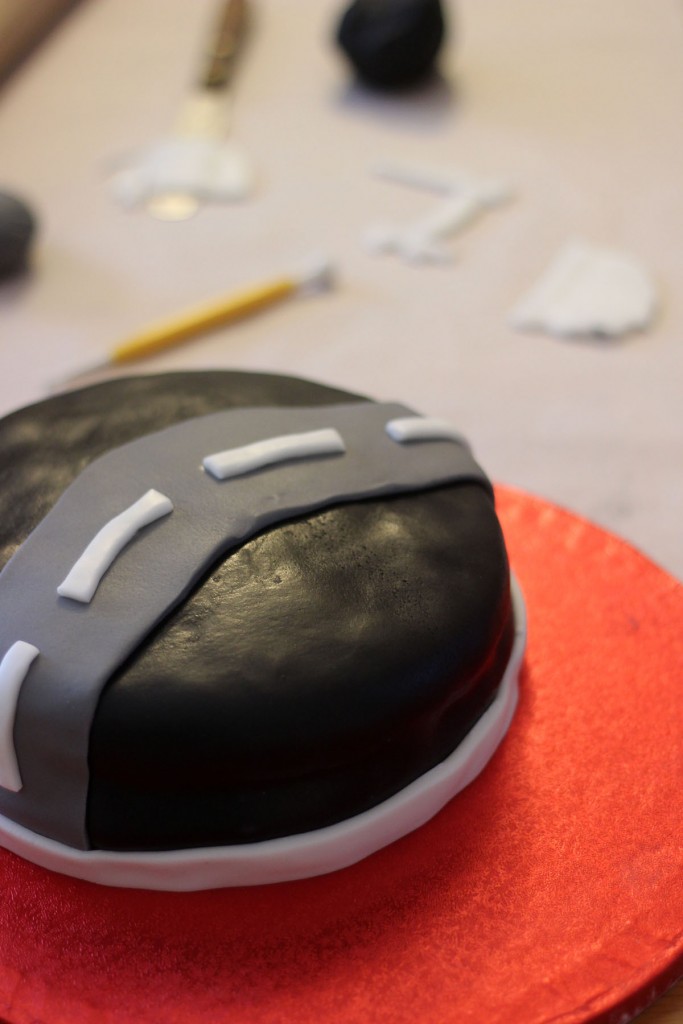
- Knead the remaining black fondant well before rolling out into a large circle, big enough to cover the whole cake.
- Gently place the black fondant over the cake and shape the icing to cover the sides without any gaps or creases.
- Next, between the palms of your hands, roll half of the grey fondant into a short, fat sausage shape.
- Place the grey fondant on to your work surface and roll out a long strip, long enough to go from one side of the cake to another.
- Using your sharp knife, cut the grey fondant into the shape of a wiggly road.
- Brush the top of the cake with a little edible glue and affix the road to the top and side of the cake.
- Next, take just over ⅔rds of the white fondant and roll this into a long, thing sausage, that is almost long enough to surround the outside edge of the cake.
- Roll this flat and trim to make a ribbon that will fit the bottom of the cake.
- Brush the bottom of the cake with a little edible glue all the way round, and finish the bottom edge of the cake with the white fondant ribbon.
- Roll out ⅔rds of the remaining black fondant and cut out tiny black squares, half the height of the white ribbon and stick on to the white ribbon, creating a chequered flag effect.
- Pinch a little of the white fondant and roll out before cutting thin rectangles to stick to the grey fondant forming the road markings.
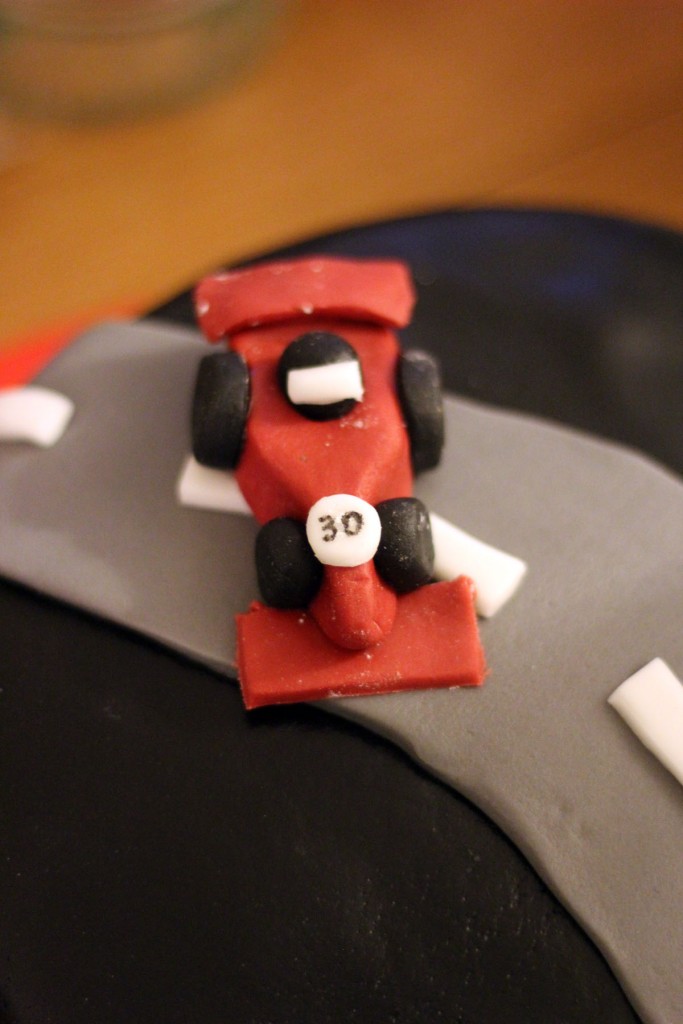
- Next, take the red icing.
- Pinch an amount the size of two grapes and place to one side.
- Form the remaining red fondant into a triangle.
- Pinch the triangle roughly half way up the sides and create a pointier, more narrow front, just like an F1 car.
- Using the tip of your finger, poke a whole toward the back of the car.
- Roll a pea sized amount of black and glue this into the hole - this is your drivers helmet.
- Take a tiny pinch of white fondant, roll out and cut a small rectangle, small enough to be glued to the pea sized black fondant. Stick this to the pea sized black fondant creating a visor for the helmet.
- Cut a tiny circular disk and glue to the narrow front of the car.
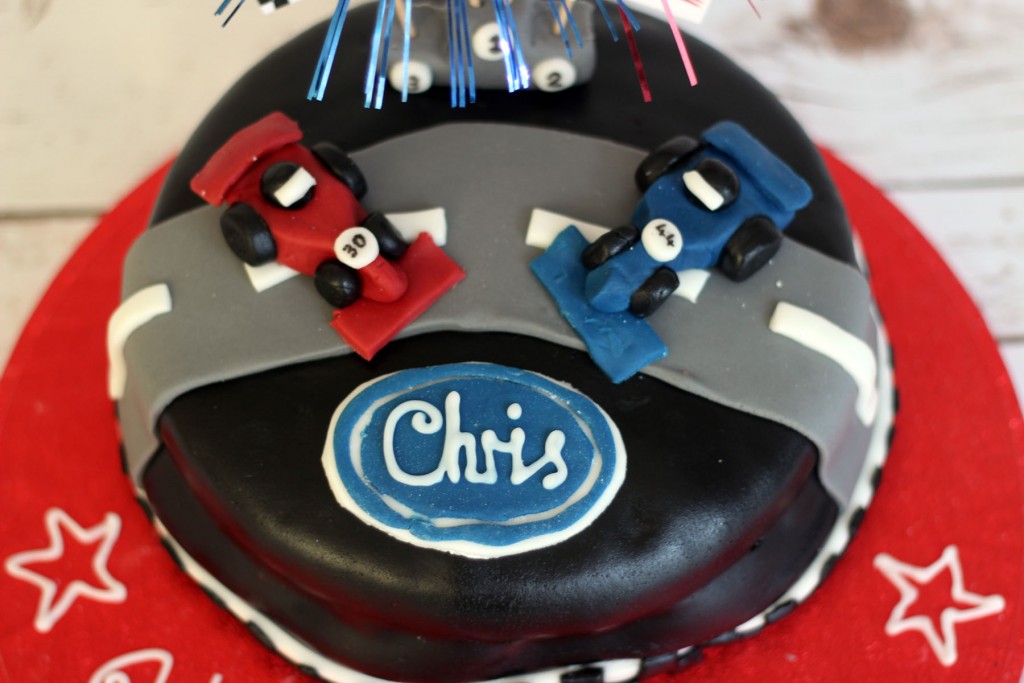
- Using the edible marker, add a number to the disk. I used 44 for Lewis Hamilton and 30 for Chris' age.
- Next take half of the remaining black fondant and cut out 4 small circular for wheels. I used a star icing nozzle to create the effect of spokes on the wheels.
- Stick these to the side of the car using a little edible glue.
- Finally, take the remaining red fondant and roll out two rectangles.
- Using edible glue stick on to the front of the car, just under the nose, and one on the back behind the helmet.
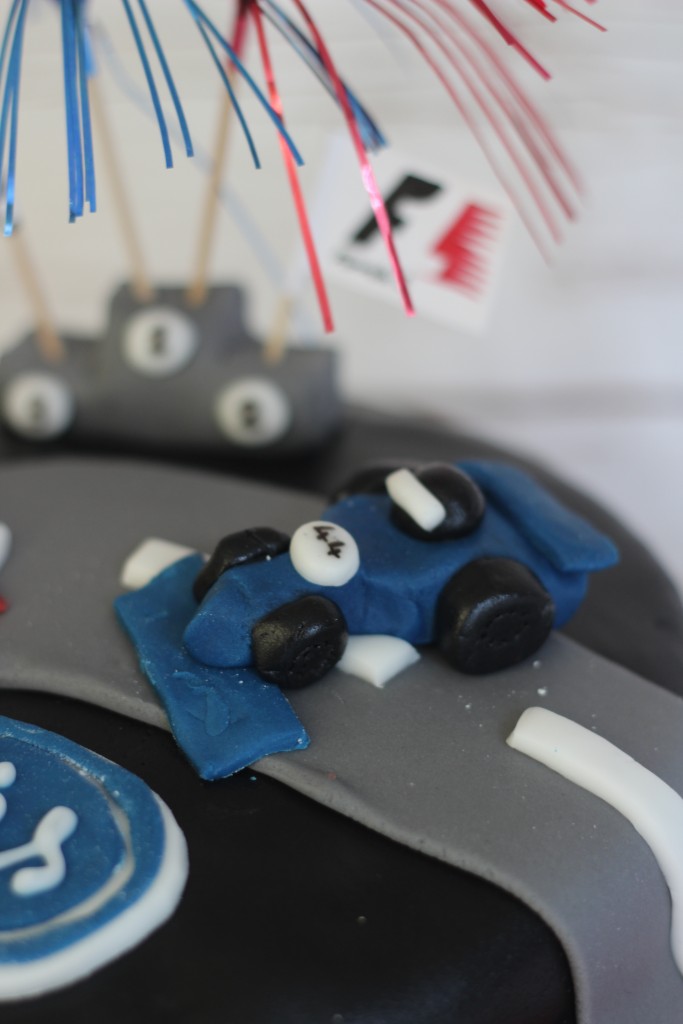
- Using ⅔rds of the blue fondant, repeat this process to make the second car.
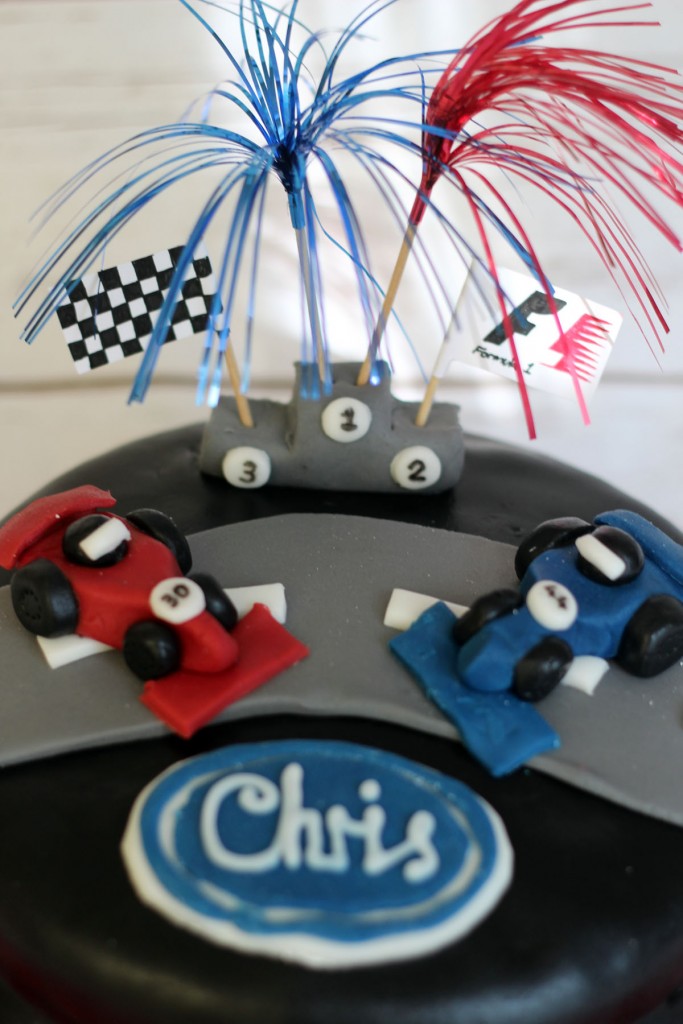
- Stick the two cars on to the road on top of the cake using a little edible glue.
- Take the remianing grey fondant and shape into a podium.
- Using the edible markers write 1, 2 and 3 on the different levels.
- Stick to the back of the cake using a little edible glue.
- Next, roll out the remaining white fondant and cut into an oval shape.
- Repeat with the blue fondant cutting the oval slightly smaller.
- Stick the white oval to the front of the cake, then the blue oval on top using a little edible glue.
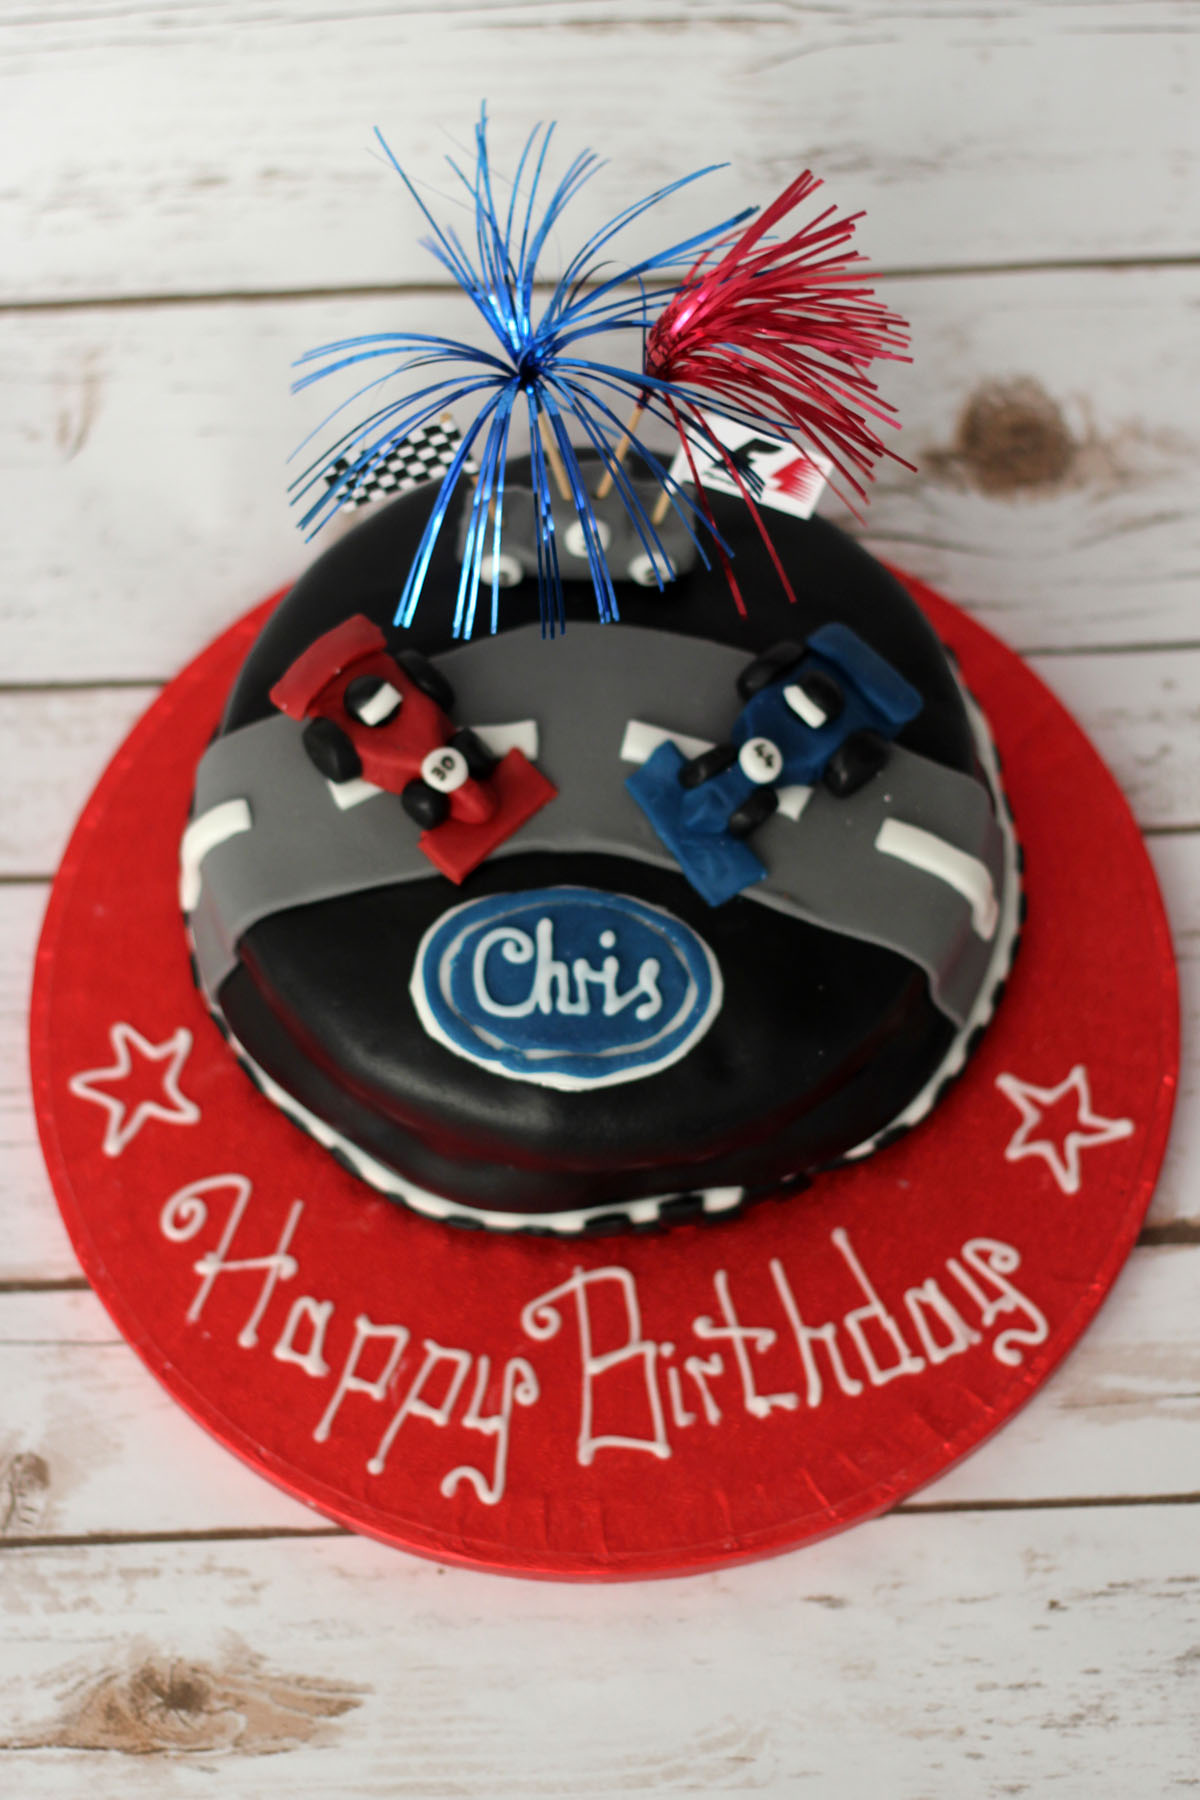
- Take your writing icing and pipe your message, this might be 'Happy Birthday' or the name of the birthday boy or girl!
- Last but not least, make two little flags out of the paper and toothpicks, one with the formula 1 badge and the other in the style of a chequered flag.
This was the first time that I have completed a celebration cake covered in fondant on this scale. On numerous occasions I had to consult Youtube but perhaps more usefully, I reached out to the food blogger community who had some fantastic tips!
The evenings when I was working on the cake were incredibly hot and humid. This is NOT good when working with fondant. Particularly dark colours like black which are more sticky by virtue of the large amounts of colouring in them.
In particular, Emily from Recipes and Reviews and Sarah from Taming Twins had plenty of words of wisdom. For example:
Use cornflour when rolling our your fondant instead of icing sugar to avoid it sticking to rolling pins and surface.
[Avoid using too much] cornflour if you're rolling out to cover a cake, is it stops the sugar paste sticking to the crumbcoat - Sarah
If you have the opposite issue - cracking dry fondant - you can sometimes sort this out with a tiny bit of Trex (a type of vegetable fat) on the surface - Emily
I think my main tip would be not to panic! There were a couple of points where things just weren't going right. Take a step back, reassess what it is you are trying to achieve and simply start again. The great thing about fondant is that you can just screw it back up into a ball, knead it and try and roll it out again.
The cake wasn't perfect, but I was still incredibly proud of what I had achieved. Because of this I'm linking up this Formula 1 Themed Cake to the July Cake Club over at Kerry Cooks Blog. You can see all of the entries here - or just click the logo!

Have you ever tried making a Formula 1 Cake? Or perhaps you've got some tips and tricks for working with fondant or sugar paste? I'd love to hear them in the comments below!

Kerry @ Kerry Cooks says
This is just amazing! As someone who is useless with fondant I am very impressed! Thanks for entering #cakeclub!
Emma Walton says
Awww thanks Kerry! My pleasure! I've got to start thinking about my next entry!!! Probably not going to try braving fondant in this heat again but we shall see...
Helen @ Fuss Free Flavours says
Wow that is one impressive cake! I am in awe! You absolutely should be proud of yourself.
Emma Walton says
Awwww thanks Helen! I am often overly critical of myself but I think I like this cake decorating malarky...this probably won't be the last one I do.
Jasmin Charlotte says
This looks amazing! What an awesome cake. I also bought my boyf F1 tickets for his birthday this year, I totally should have made him a cake as well! xx
Emma Walton says
Thanks Jasmin! There is always next year 😉 why not pin the recipe! X
Emily says
How brilliant and creative! I know someone who would love this for their birthday x
Emma Walton says
Thanks Emily! If you ever give it a try I'd love to see pictures 🙂
Penelope says
That is amazing - I am rubbish at cake decorating. Smooth buttercream is my limit. I may have to come back to this post for my husband's 40th next year!
Emma Walton says
You should definitely give it a go!!!! I've never done anything like this before so if I can, you can 😀