Stop buying bland and uninspiring dried pasta and start making fresh pasta at home today! Read on to find out how.
Fresh pasta versus dried pasta
Dried pasta is a fantastic staple to have in the cupboard. It comes in so many different shapes and sizes, you could have a whole kitchen full of different pasta shapes if you really wanted to. And it's tempting because each pasta shape has been created with a different sauce in mind (more on pasta shapes below). But, as cheap and versatile as dried pasta is, sometimes a recipe calls for fresh pasta and for good reason.
Dried pasta is usually made from mixing semolina and water into a stiff dough that is then shaped (often using moulds in factories) before being dried out so that it has a long shelf life. Because of the way it is processed, it has a much firmer texture and takes a long longer than fresh pasta to cook. But, this isn't all bad, because it's more robust it lends itself to heavier sauces.
Fresh pasta, on the other hand, is made by mixing egg and flour into a softer, more pliable dough. This dough is then kneaded to build up the gluten before being rested and rolled until it is thin enough to make sheets or ribbons of pasta.
In my opinion, fresh pasta from the supermarket is not worth the price tag. It's often double the price of the most expensive dried pasta and in terms of colour, flavour and texture it disappointing and no where near as good as pasta made at home.
The basics of pasta making at home
The good news is that making pasta is an incredibly easy process. It's also one of those wonderful processes that is very hands on which makes it wonderfully therapeutic. I can wholeheartedly recommend spending an hour in the kitchen making a big batch in one go. You can then enjoy a fresh pasta dinner and refrigerate or freeze the rest so that you always have a supply on hand. If you can get into the habit of making fresh pasta on a Sunday. It will then be Monday night's dinner with any left being used for lunches.
Here are the basic steps:
- Selecting your pasta-making equipment
- Mixing and kneading the pasta dough
- Refrigerating or freezing the pasta dough (optional and only recommended if you're making a large batch)
- Resting the pasta dough (essential!)
- Shaping or rolling and cutting the pasta dough
- Cooking the fresh pasta
Selecting your pasta making equipment
Pasta has been made in kitchens across Italy for hundreds of years so, hopefully you won't be surprised to hear that all you will need are:
- Weighing scales
- A mixing bowl
- A rolling pin (an adjustable rolling pin like this one from Joseph & Joseph is great for working down the thickness and ensuring its even).
Although making pasta with just a rolling pin is more labour intensive, I love it. You feel like you've had a good work out after and you learn to recognise when the pasta is the right consistency much quicker if you are handling it rather than running it through a machine.
If, however, you would rather use a machine then that's absolutely fine and I will cover both methods. There are two types of pasta machine:
- A hand cranked pasta machine that clips to your work surface; or
- A pasta rolling attachment that fixes to your stand mixer and uses the motor to power the rollers.
I've linked to the pasta machine I used to use which is fantastic for beginners. If you have a stand mixer then you will need to research which is the right attachment for you.
You may also find these extra tools useful depending on the types and shapes of pasta you want to make:
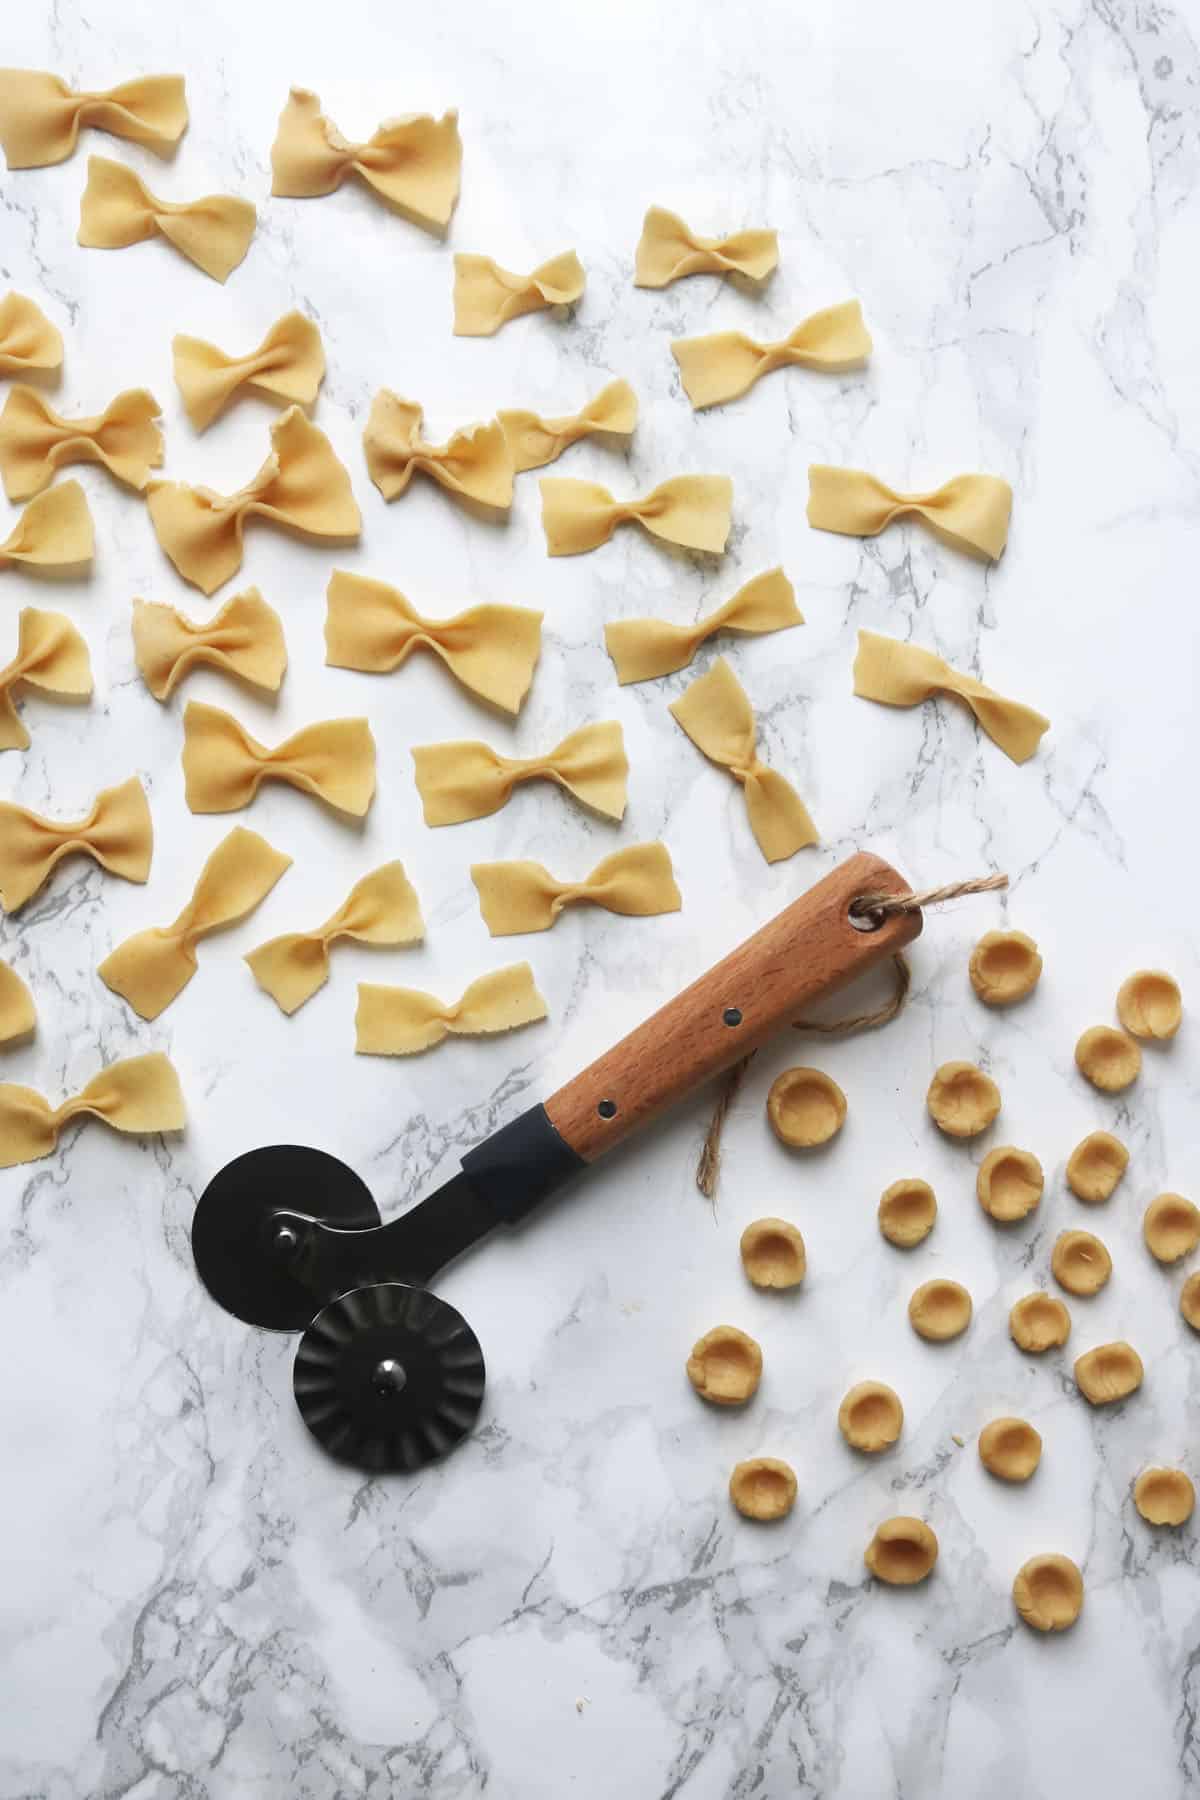
- Pasta cutter (I like to use one with a straight wheel and a wavy wheel)
- Round ravioli cutter (in my opinion the square ones are a waste of money, especially if you have a pasta cutter)
- Gnocchi board (great for getting ridges in your pasta)
Mixing and kneading your pasta dough
The first step when making fresh pasta is adding your flour to a large bowl and adding the egg. There are two methods you can use: mixing in a food processor, or by hand.
If you are making the dough using a stand mixer or food process, add all of the ingredients in one go and set it to run on low. Once it has come together into a ball, let the mixer run for up to 5 minutes so it "kneads" the dough.
If you don't have a mixer, or just prefer to make your pasta by hand like I do, place the flour into the bowl and make a well in the middle. Add in the egg then whisk the egg using a fork, slowly bring the flour down from the edge of the well a little at a time and keep mixing. Once it's coming together in a scraggly ball, start kneading it on a lightly floured counter top. Keep kneading until the ball of dough is stretchy and springy (but not sticky).
Whichever method you use, once you've finished kneading, cover the dough and leave it to one side to rest.
Refrigerating or freezing the pasta dough
If you're making a big batch of dough and don't want to cook it all, now is the time to refrigerate or freeze it. The dough will keep for a few days in the fridge and a few months in the freezer. Be sure to make sure it's wrapped up thoroughly and store in an air tight container.
Resting the pasta dough
Don't be tempted to skip this step. Once you've finished kneading your dough it should be elastic and springy. By letting the dough rest we are making sure the flour is able to soak up all the moisture in the eggs and fully hydrate and the gluten is able to relax.
If you don't rest the dough the gluten strands will snap when you try to roll it out. You will have cracks in your dough and it will break easily. This will be particularly problematic if you are rolling your dough by hand.
Shaping and cutting the pasta dough
More often than not, if I make fresh pasta I cut it into long thin ribbons, a bit like tagliatelle. Sometimes I will keep the sheets whole and use them for a lasagne or I will cut and fill them to make ravioli.
The following pasta shapes can be made by hand. Over the years I've given them all a go and some are certainly easier than other. But, there are plenty more to try, once you've mastered the dough why not give some of the more tricky shapes a try.
Orecchiette (little ears)
Once you've made the dough, roll into long sausages (about ½ an inch wide). Cut small pieces from the sausage (roughly ½ an inch long). Flour your hands and place a piece of pasta into the centre of your palm, press a finger into the centre to create a domed disk of pasta.
Farfalle (bow-ties)
Roll out thin sheets then cut into rectangles roughly 1 inch by 2 inches wide. Dab a little water down the middle of the square and pinch the top and bottom together to make that distinctive bow-tie shape.
Fusilli (pasta twists)
Roll out thin sheets of pasta then cut into thin strips. Wrap each strip around the end of a wooden spoon which has been coated in flour. Gently pull the strips off the spoon, ensuring the twist stays in tact. Leave to dry before cooking.
Parpadelle
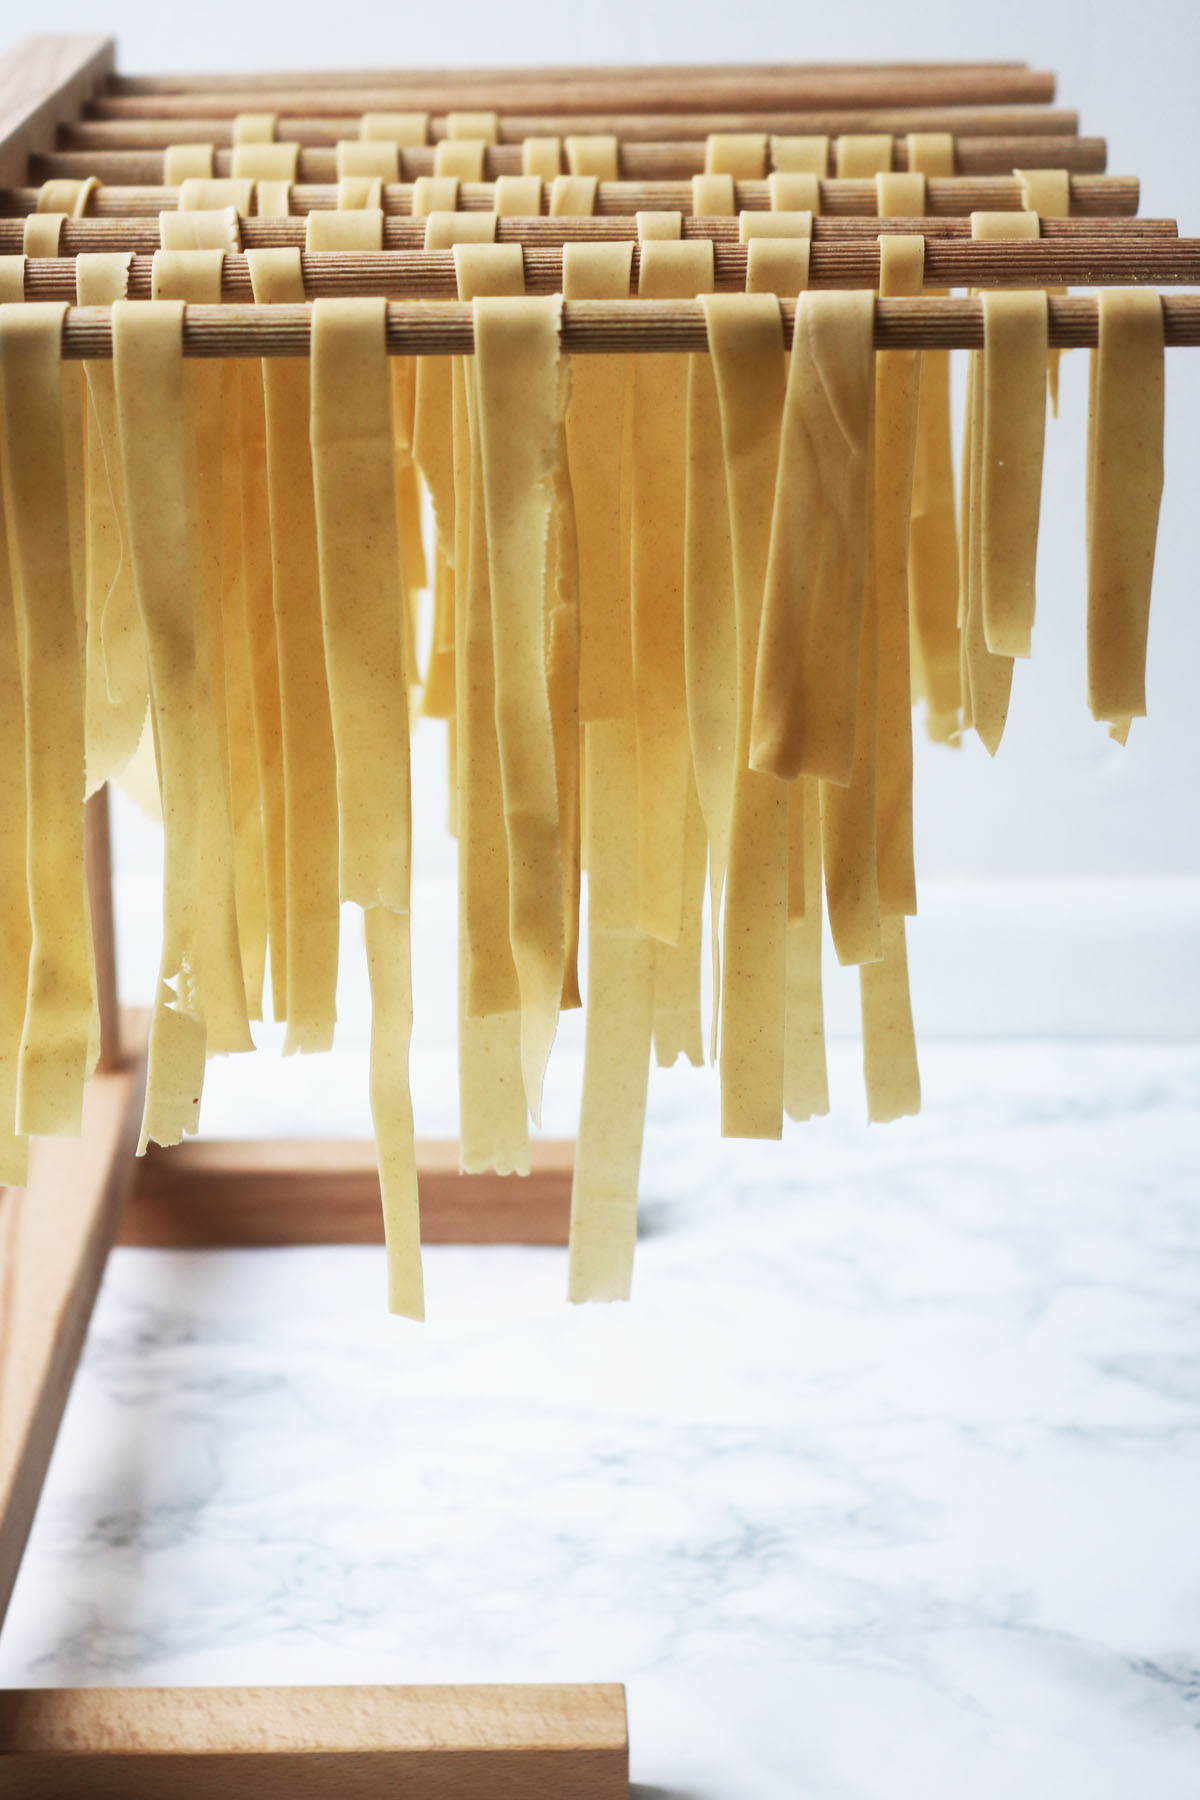
Once you've rolled out thin sheets, cut strips roughly ¾inch wide.
Cooking fresh pasta
The saying goes that pasta cooking water should be as salty as the sea. For every 1 litre of water I use 1 teaspoon of salt.
Some people add oil to the water too. If you do this I find the sauce doesn't stick to the pasta as well. The only time I'd recommend adding oil to the pan is when you're making ravioli or tortellini that you're not intending to serve with a sauce.
Fresh pasta will cook incredibly quickly, in just 3 - 5 minutes. If you're making tortellini or ravioli the cooking times will be a little bit longer as in places the pasta is double thickness and the filling will also need to heat up.
The recipe

Home-made Pasta
Ingredients
- 140 grams Italian '00' flour
- 1 egg whole
- 1 egg yolk
Instructions
- Create a mound of flour on a clean worktop or simillar surface.
- Make a well in the middle and add the egg and egg yolk.
- Using your hand, mix the egg, slowly bringing in flour from the sides of the well until all the flour has been incorporated.
- Knead the mix and bring into the shape of a ball.
- Knead it well until it becomes stiff and harder to knead.
- Wrap the dough in cling film and leave to rest in a cool place for 1 hour before using.
- To roll out the dough, cut the dough into 2 pieces.
- Flatten each piece with a rolling pin to just a few milimetres thick.
- Fold the dough in half and feed throgh your pasta machine on its widest setting.
- Do this 7 times until you have a uniform long, rectangular strip that has started to become shiny.
- Repeat the above steps with the second piece of dough.
- Pass the dough through the rollers decreasing the roller setting down a notch each time until you are at the thinnest setting.
- You can now choose to leave in sheets for lasagne or ravioli or cut into pasta shapes and noodles.
- Cooking the pasta from fresh should take no more than
Notes
Nutrition
Can you make fresh pasta without egg?
Absolutely! If you're looking for a fool-proof vegan pasta recipe then I've got you covered.
More pasta recipes
More Italian Inspiration
If you love Italian food as much as I do, check out some of my favourite recipes inspired by Italy.

Cliona Keane says
I love making my own pasta! It's so much more satisfying than shop bought and you can do so much more with it, yours looks amazing!
Katie | Healthy Seasonal Recipes says
I haven't made home-made pasta since I was in culinary school. Thanks for the reminder of how easy it is!
Emma Walton says
My pleasure Katie 😀
Heidy says
I am so happy to see you’re making your own fresh pasta. The taste is so much better. The cost even to make organic pasta is minimal.
Emma Walton says
You're right, it is SO worth using the best ingredients because it really is incredibly cheap!
Patty says
I've tried to make my own pasta but the recipe I had wasn't very good, will try your way next time! Also thanks for the tips about how to shape pasta!
Emma Walton says
My pleasure Patty. Definitely dont skip the resting time for the dough. It i ls very hard and not very maleable but the resting sorts that out and is nuch easier to roll afterwards.
Linda @ With A Blast says
I am so glad I found your post ! Always wanted to make my own pasta (also huge pasta fans!) but I did not realize the fresh pasta can be frozen ! Thanks for sharing (pinned this 🙂 )