Everything you need to know about brewing kombucha at home
Want to learn how to brew kombucha at home? Then you’ve come to the right place. Scroll down to find out everything you need to know about brewing kombucha in your own kitchen!
Page Contents
Let’s brew kombucha!
I’m so excited to share this post with you. Like most people my first introduction to kombucha was in the form of a very expensive glass bottled drink that I picked up in a health foods store. As a fizzy drink addict and someone who loves sour flavours I was immediately hooked. But my kombucha (aka “booch”) habit was going to make me bankrupt very quickly if I was buying it from the store every day.
Luckily I had a good friend who was already brewing her own kombucha in her kitchen in Baltimore so on a trip to the US she gave me a crash course in brewing kombucha at home. After a couple of false starts (no doubt thanks to the TSA having a poke around at my dehydrated SCOBYs) I finally got the hang of things. I named my first batch “Vince Noir” as he was made with black tea and I’m pleased to say he is still going strong!
With every batch I brew I am continuously learning. I’ve written this post to document everything I’ve learnt and to help those of you who also wants to start brewing at home. If you have any questions please do not hesitate to ask them in the comments. I also often provide updates in my stories on Instagram so do head over to my profile and say hello! Without further a do, let’s get brewing!
What is kombucha?
In the simplest sense, kombucha is a fizzy drink made by fermenting sweet tea. It is often flavoured with fruit during what is known as the “second ferment”. The drink has gained popularity in recent years thanks to the various health benefits that are associated with it and other fermented foods and drinks.
Jargon buster
There’s a lot of technical language that comes along with brewing kombucha, before I delve into the detail here’s a quick guide to some of the jargon.
Batch brew – a method of making kombucha where the whole batch is bottled or flavoured.
Burping – opening the bottles or jars in which the kombucha is stored to allow excess gas to escape, thereby prevent the bottles or jars exploding. (No one wants to clean up that mess!)
Continuous brew – a method of making kombucha where only some of the batch is bottle of flavoured. New cooled, sweetened tea is added to what is left to create a continuous brewing cycle.
First fermentation (aka 1F) – the first stage of kombucha brewing where tea, sugar, starter fluid and SCOBY ferment to form unflavoured kombucha.
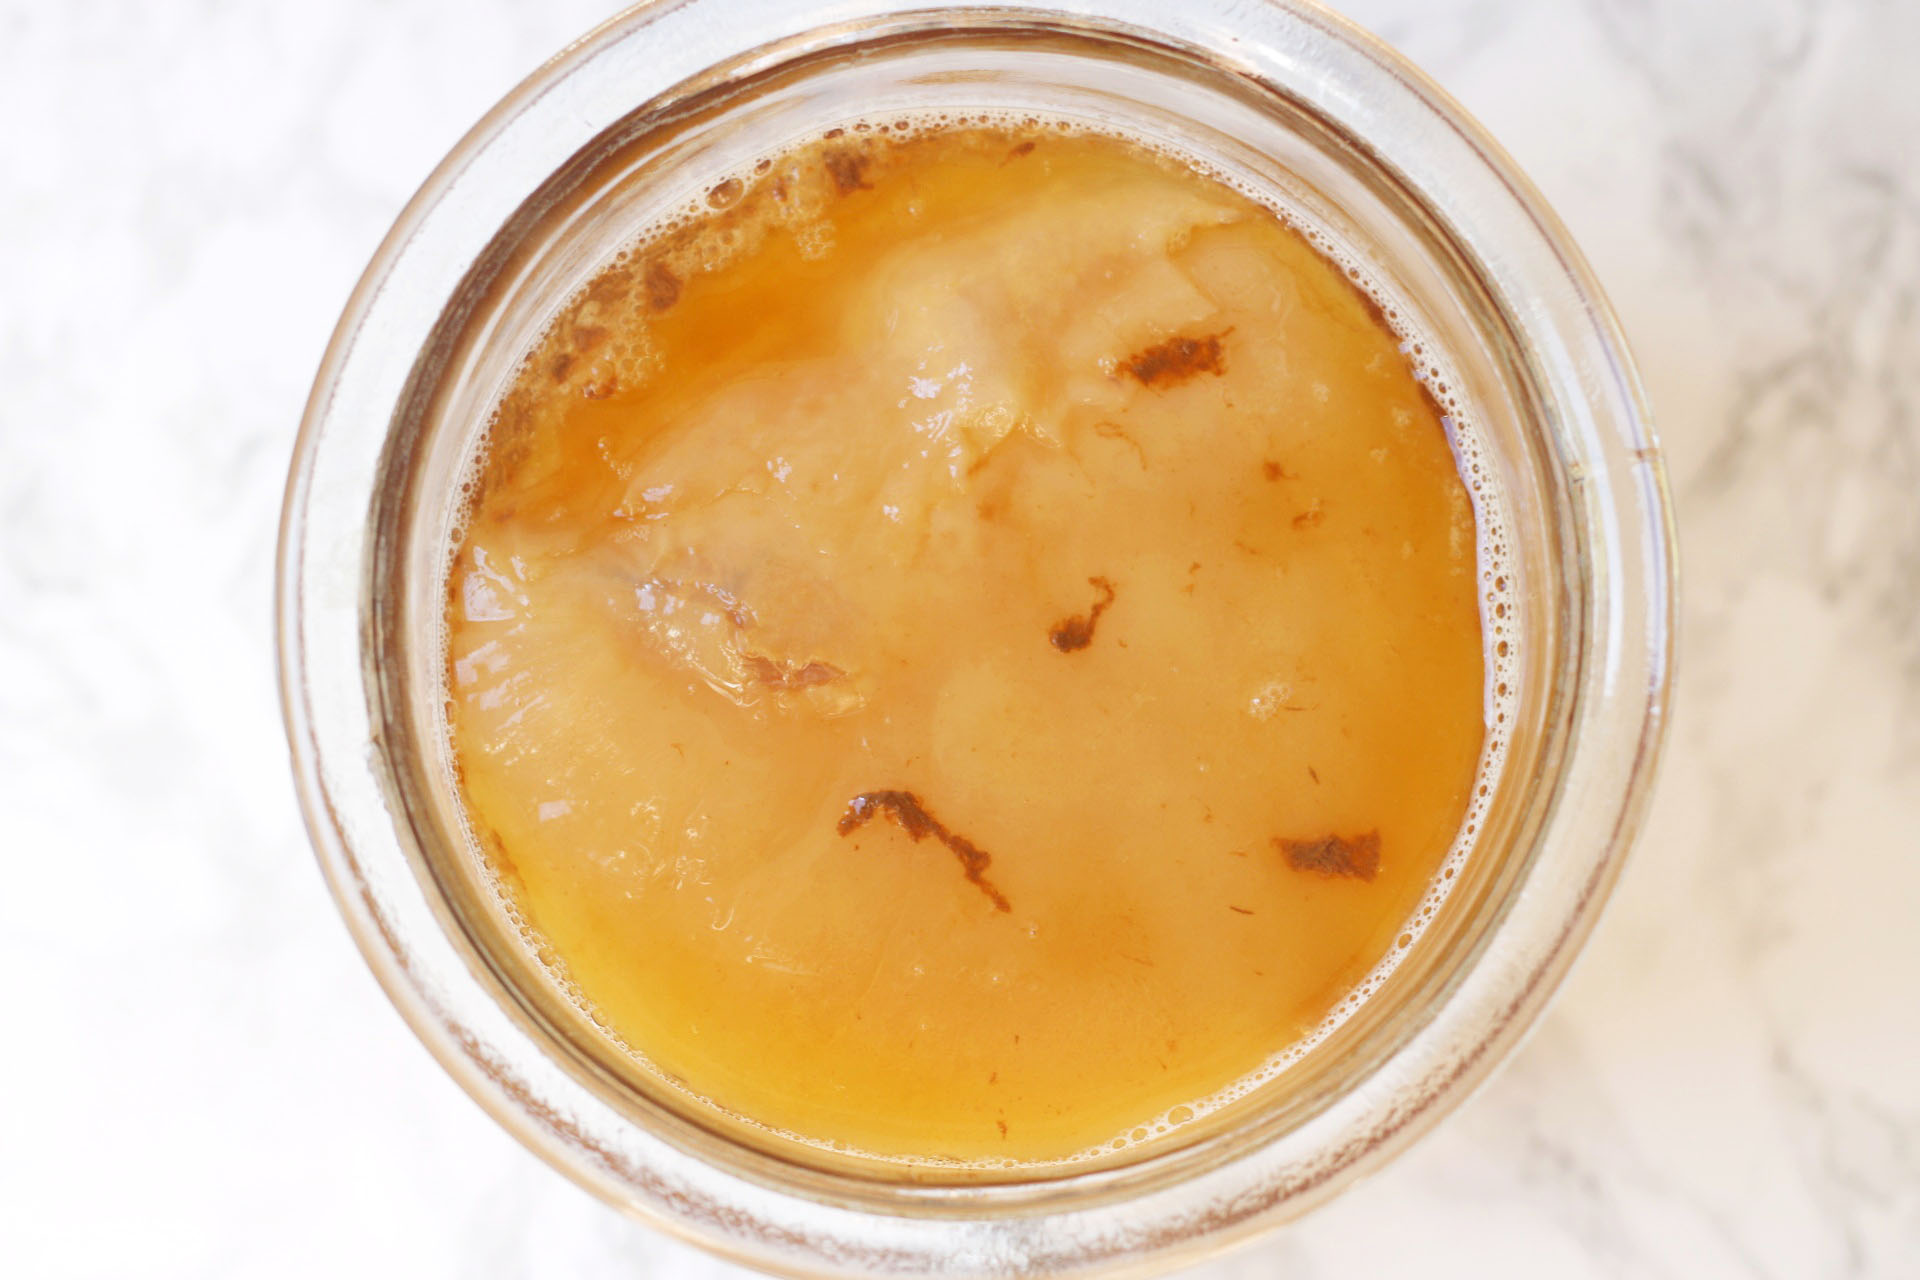
SCOBY – SCOBY stands for “symbiotic culture of bacteria and yeast”, this is the weird jellyfish-like formation on top of the brew. See the section on SCOBY health below to find out what’s normal and when things have gone wrong!
SCOBY hotel – a jar or similar container filled with kombucha used to store SCOBYs until they are required.
Second fermentation (aka 2F) – the second stage of kombucha brewing where flavours are added enhance the taste of the kombucha. This stage is optional, kombucha can be drunk after the first fermentation is complete.
Starter fluid (aka starter tea or mother tea / fluid) – this is already-made kombucha that is added to sweet tea in order to start the process of fermentation. It has all the bacteria and yeast needed for fermentation to occur.
Basic ingredients
You need just 4 ingredients to make kombucha: (1) tea; (2) sugar; (3) water; and (4) starter fluid. Sounds simple right? It is so long as you follow a few rules.
Tea
You can make kombucha from almost any type of tea: black, green and white all work incredibly well. It doesn’t even matter if you use loose leaf or a tea bag. That being said you should always try to avoid teas which have oils or flavourings added as they can damage your SCOBY. It is always recommended that you add flavourings during second fermentation. (See ‘Flavoured Kombucha‘ below.)
Black tea is the most common tea used. If you want a kombucha with a less noticeable tea flavour then opt for green or white tea. Black tea fives the deepest flavour, green tea sours quickest and white tea gives you the most neutral flavour.
If you want to get experimental you can mix two types of tea. You might do this by using different teas to create your sweetened tea. Or, you might use starter fluid that was made with one type of tea (e.g. black tea) to make a batch that is predominantly made with another type of sweetened tea (e.g. green tea).
Sugar
Sugar plays an important role in kombucha brewing – during the first fermentation it is not there to provide a sweet flavour, rather it is there to feed the SCOBY. Your SCOBY will find white sugar easiest to digest, I use granulated and caster sugar interchangeably depending on what I have in the cupboard. Golden caster or granulated sugar will also work well. SCOBYs don’t like to be fed with brown sugar (e.g. demerera) or natural sugars like maple syrup. Lots of people have successfully experimented with alternative sugars so don’t be shy to give it a go but I’d always recommend only doing so if you have a a SCOBY hotel as back up! (Read more about ‘SCOBY hotels‘ below).
Water
If you’re familiar with making sourdough you probably already know that water straight from the tap contains chlorine which is there to kill of bacteria, viruses and other nasty bugs! Because your SCOBY is made up of bacteria chlorinated water is not its friend. This leaves you with a couple of options: (1) buy expensive bottled water to brew with; or (2) leave your water out overnight so that the chlorine can evaporate; or (3) boil your water for a good 15 minutes to evaporate the chlorine.
For the first couple of batches we treated our SCOBY to bottled water. But given that I was brewing kombucha at home to help me save money this seemed a little silly. We then moved to leaving the water out overnight (which was what we did when establishing our sourdough starter). These days I use water straight from the tap, boil it to brew the tea and then add it straight to my fermentation jar. I’d recommend taking a cautious approach like we did in the early days. It’s hard to know how much chlorine is in the water where you live so on this one do as I say not as I do!
Starter fluid and SCOBYs
The starter fluid is essential to kicking off the fermentation of your sweetened tea and without it you won’t have kombucha! A lot of people don’t realise that the SCOBY is optional. If you have a good starter tea and have used the right ratio of sweetened tea then a SCOBY will soon form out of no where!
It is possible to make your first batch of kombucha and to grow a SCOBY from a bottle of raw, unflavoured kombucha bought from the store. It’s also possible to bring dehydrated SCOBYs back to life by making starter fluid from apple cider vinegar though I’ve had limited success with this method.
My recommendation would be to buy a SCOBY and starter fluid from a well known-supplier or from a friend who has a SCOBY hotel (see ‘SCOBY hotels’ below). My SCOBY and starter fluid came from Happy Kombucha and was purchased via Amazon.
Equipment
The basics
There is some basic equipment that you won’t be able to brew without!
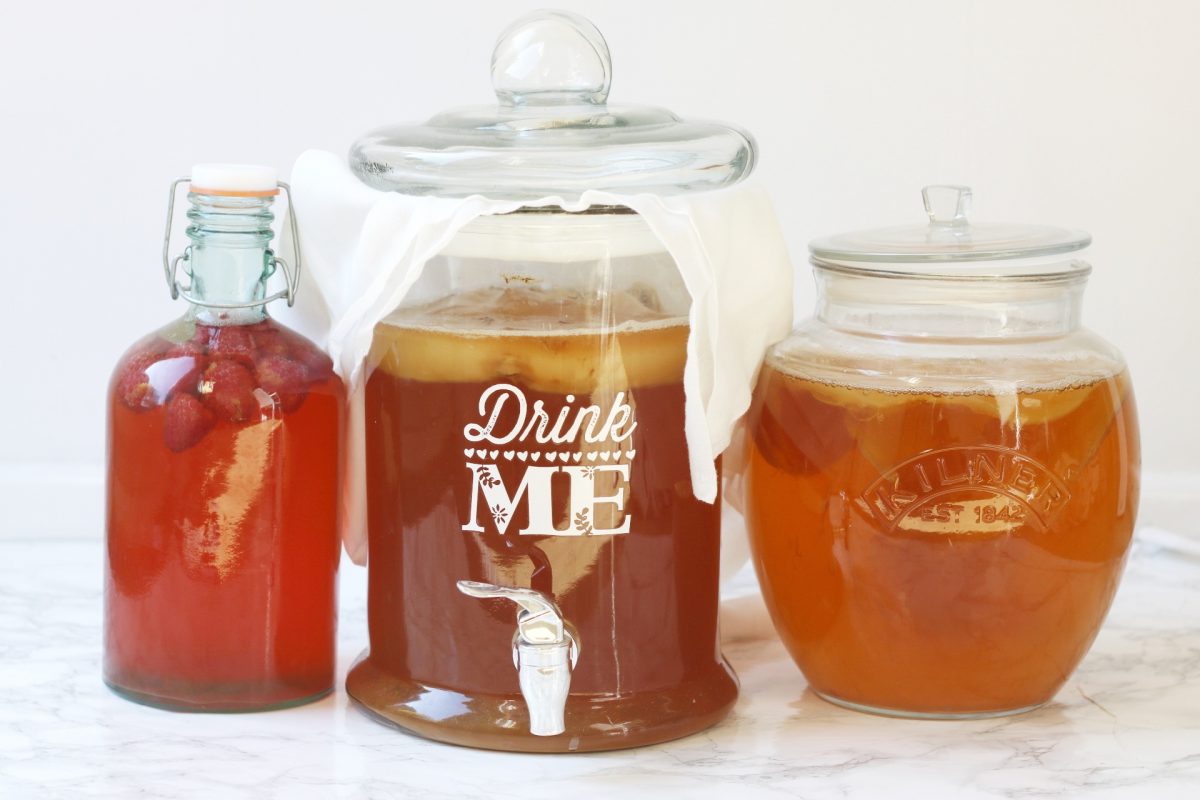
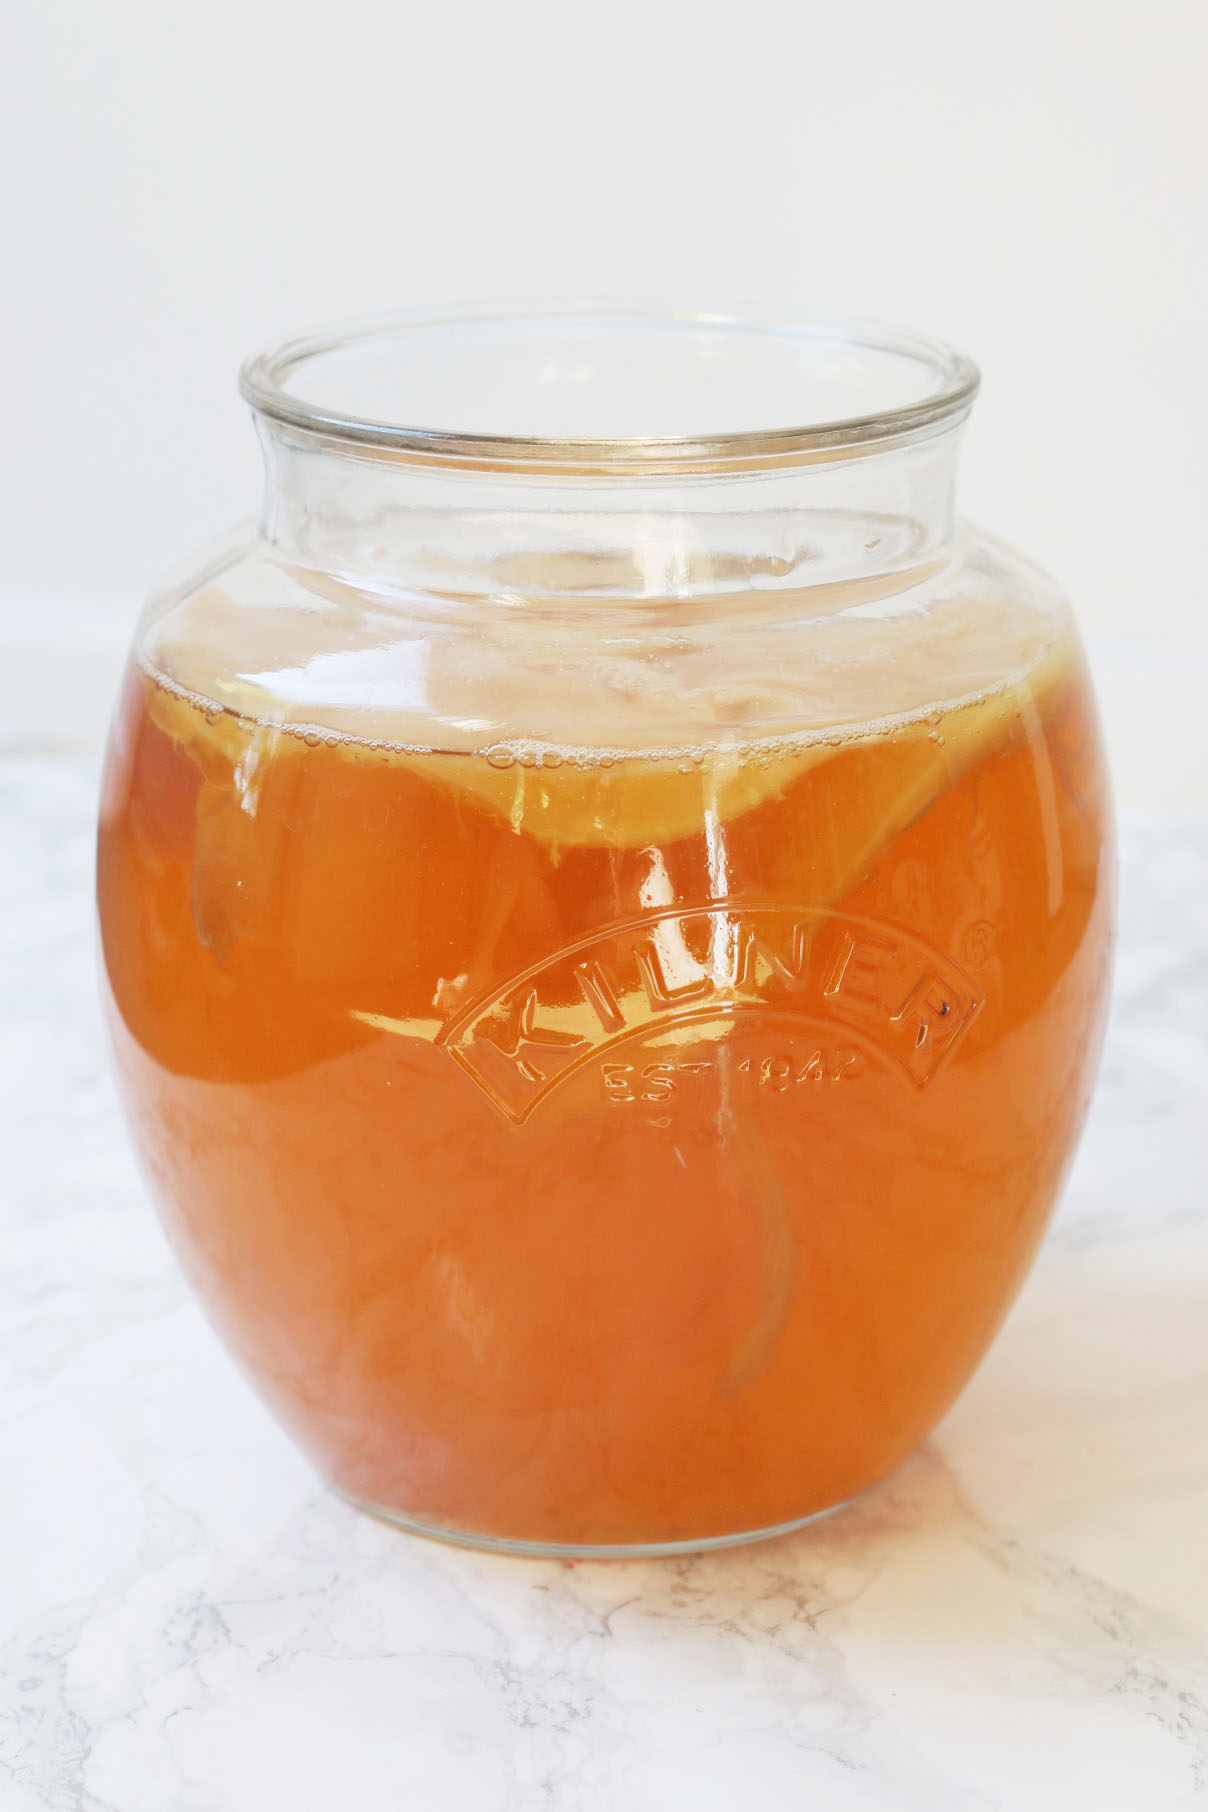
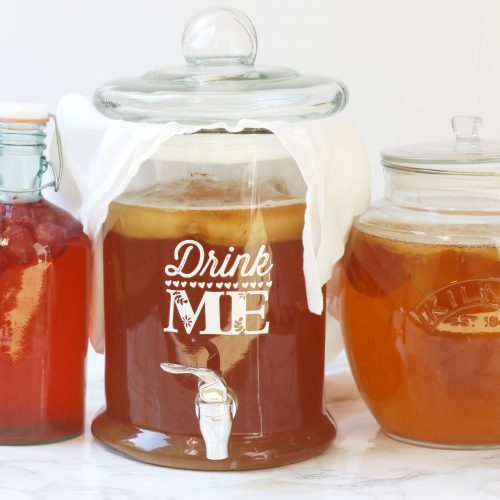
Brewing vessel
You’re going to need something to brew your kombucha in. For most people this will be a big Kilner jar or a glass drinks dispenser with a tap. The latter is a particularly good brewing vessel if you’re going to do the continuous brew method. Ideally you want something big enough to allow you to brew roughly 2.5 litres at a time (which is what my recipe produces).
Cotton cloth
Your kombucha needs to be able to breathe so you don’t want to use an airtight lid on your brewing vessel. To keep out fruit fries and other nasty bugs out of your brew, a thin cotton cloth should cover the top of your jar. The lid of my brewing vessel isn’t air tight (in fact far from!) So I have a cloth and rest the lid on top rather than securing it with a rubber band. But the choice is yours!
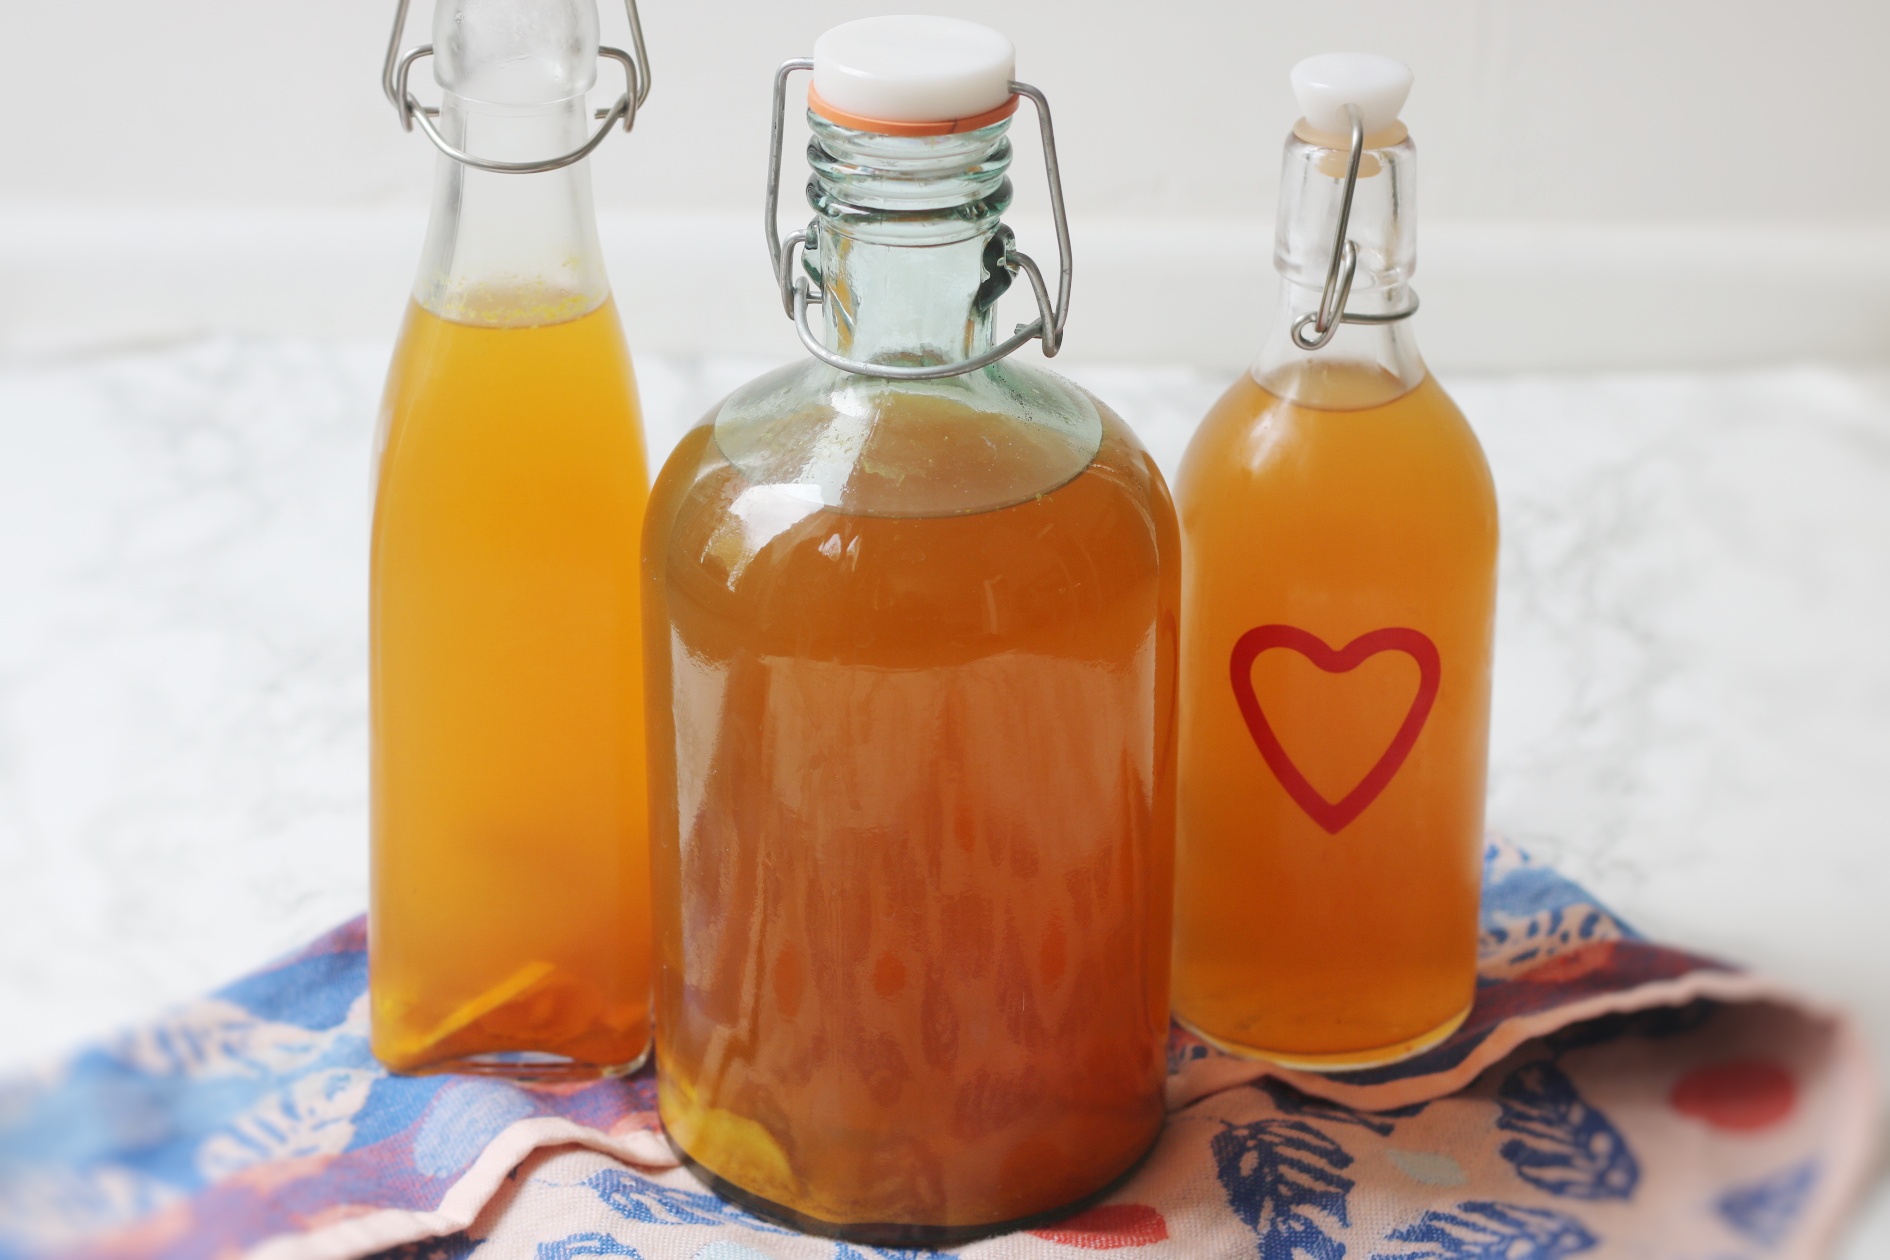
Bottles
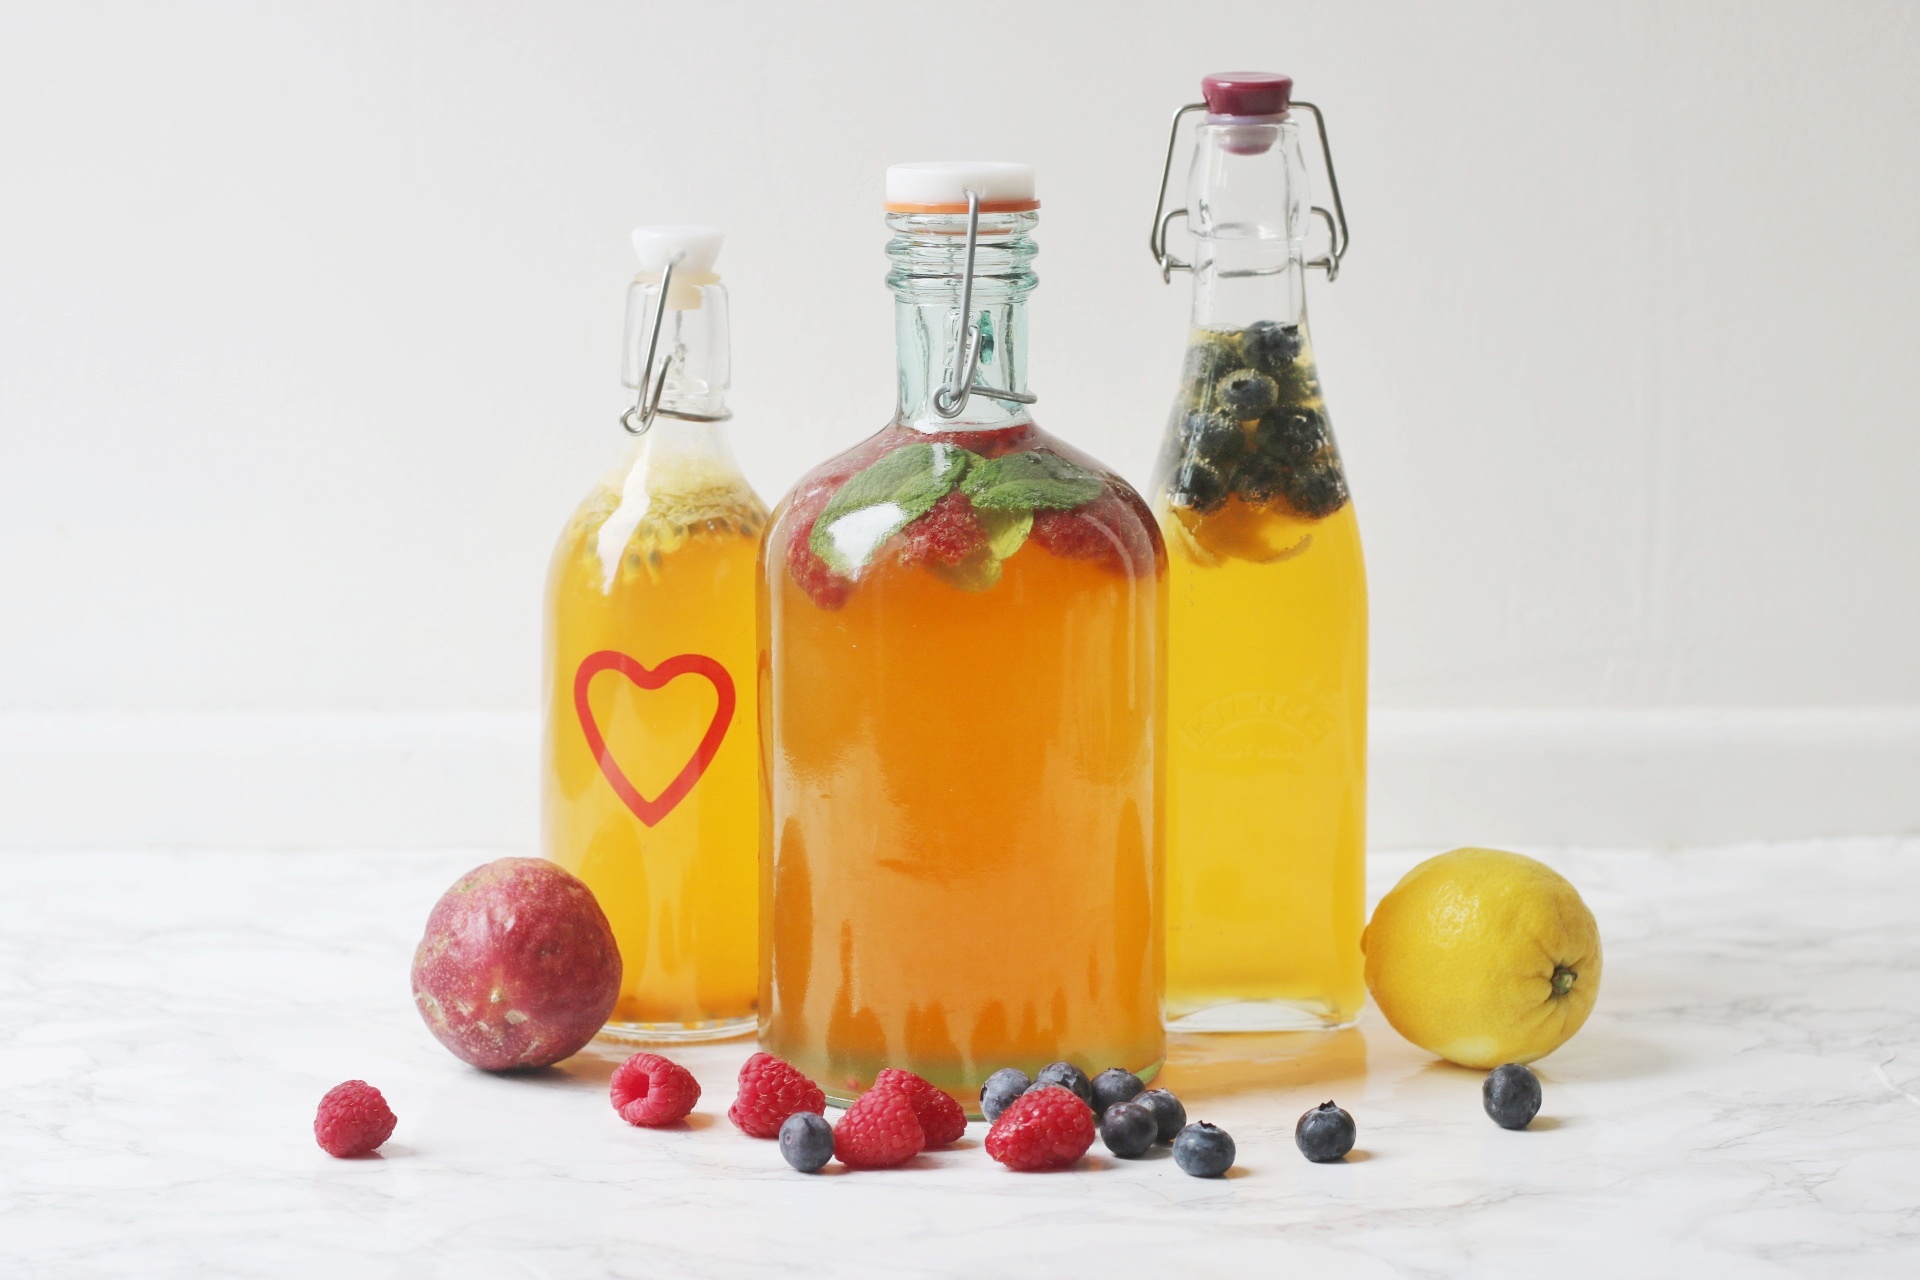
Once your kombucha has brewed you’re either going to want to bottle and store it our bottle and flavour it. (More on ‘Bottling and Storing‘ below.) When brewing kombucha at home you really can’t live without glass swing top bottles. They don’t need to be fancy (the brown ones used for beer work really well) but you should check that they are made to bottle carbonated drinks. If not you could have a messy explosion on your hands.
I actually bought these bottles for my Elderflower Champagne which is also a very volatile brew thanks to all the natural yeast! They have withstood years of use.
Extras
Heat mat
Kombucha brews best at between 20C – 25C (68F – 78F). If you’re brewing all year round you might find that in the winter months it gets a little cool. I keep my kombucha in the kitchen where there are no radiators so it often gets pretty chilly. You can make sure that your kombucha is at the right temperature by investing in a heat mat.
pH meter
Most brewers will decide whether or not their kombucha is ready by taste alone. And 9 times out of 10 that’s what I do. Sometimes if I’m being impatient and want to move to second fermentation quicker than I normally would I will use a pH meter or pH strips to make sure it is acidic enough. Ideally it should have a pH between 2.5 and 3.5. I like mine on the sour side so aim for between 2.5 and 2.8.
We use this pH meter not just for our kombucha but also for brewing beer. You should calibrate it every now and then but we’ve found it to be very useful to have in our brewing cupboard!
Bottle brush
Cleaning your bottles after they’ve been used can be a real chore, especially if you used a lot of spice or other ingredients that have clung to the inside of the bottle. A bottle brush really comes in handy!
Filters
Filtering your kombucha is not necessary at all. But, if like me your’e not a fan of your drink having floaty bits you might want to use coffee filters, muslin / cheese cloth or even a tea strainer to get a clearer drink.
Continuous brew versus batch brew
I mentioned these two methods in the ‘Jargon Buster’ above. Batch brew is where you brew a batch of kombucha and then drink or flavour the entire batch. You might want to do this when you first start out if you are unsure how long it will take you to drink a batch or if you want to brew kombucha as a one off.
If you are a regular kombucha drinker you will probably want to use the continuous brew method. In this method, you brew a batch of kombucha and then drink / flavour most of it, the bit your don’t drink / flavour you leave in your brewing vessel and top up with more sweetened tea. If you get the balance right, in the time it takes you to drink the first batch of kombucha your second one will finish fermenting. This way you can continuously brew and have kombucha in the fridge to drink!
My recipe for unflavoured kombucha below can be used for batch brewing or continuous brewing. If you use the continuous brew method I recommend marking your brewing vessel so you can make sure you are always leaving at least 200 millilitres of starter tea in the brewing vessel before you add your sweetened tea.
Unflavoured kombucha recipe
Unflavoured kombucha
Equipment
- 3 litre brewing vessel
- Cotton cloth
Ingredients
- 4 teabags black, green or white (see note 1)
- 2 litres water
- 150 grams white sugar caster or granulated is fine
- 200 millilitres starter tea either store bought or from a previous batch if doing the continuous brew method
- 1 SCOBY optional
Instructions
- Add your teabags to a jug and pour over 2 litres of boiling water.
- Let the tea steep for 5-10 minutes depending on how strong you want the final flavour of tea to be.
- Remove the tea bags and stir in the sugar.
- Keep stirring until all of the sugar has dissolved.
- Let the sweetened tea cool until it is roughly 20C (68F).
- Pour the sweetened tea into your brewing vessel before adding the starter tea and the SCOBY if you have one.
- Cover your brewing vessel with the cotton cloth and secure with a loose lid or a rubber band.
- Leave to ferment for at least 7 days before tasting – in this time a new SCOBY may begin to form over the top of the tea, this is perfectly normal.
- The kombucha is ready to bottle and/or flavour when the balance of sweet and sour is exactly to your liking! Depending on the time of year and the size of your SCOBY this can take between 1 week and 1 month.
- Decant into bottles and either flavour or refrigerate until ready to drink.
Notes
Flavoured kombucha
There are so many options when it comes to flavouring your kombucha that I have done a separate post with tonnes of suggestions for interesting flavour combinations. These can be used regardless of the type of tea you originally brewed with. The beauty of brewing kombucha at home is that you can experiment and tweak the final kombucha so that it perfectly suits your tastes. I also love seasonal flavours using ripe berries int he summer, pears in the autumn and cinnamon, ginger and other spices in the winter.
Check out my kombucha flavour inspiration post here or keep reading for more information on ‘Bottling and Storing‘ whether or not you choose to flavour your kombucha during a second fermentation stage.
Bottling and storing
Bottling without a second fermentation
If you decide you want to bottle without flavouring your kombucha then you can do so the second you decide the acidity level is to your taste. Simply decant your kombucha into appropriate bottles after the first fermentation and keep in the fridge. The longer you leave it at room temperature the fizzier it will get. If you find it’s not getting very fizzy on its own you may need to add a little sugar (1/8- 1/4 of a tsp per 500ml) to give carbonation a kick start. Unflavoured kombucha has a really long shelf life in the fridge – in theory it will last up to 3 months but mine always gets drunk a lot quicker than that!
Bottling during second fermentation
To add flavour, decant your kombucha into appropriate bottles after the first fermentation then add your fruit/vegetables/herbs/spices to your bottles along with the unflavoured kombucha. This process is known as the second fermentation as the sugars in the additional ingredients will ferment creating more fizz in the finished drink as well as adding flavour. Leave the bottles at room temperature for 3-7 days, checking the level of carbonation regularly (you can do this by burping the bottles once a day and listening for the signature “fizz” or “hiss” as gas escapes the bottle). If you are using fresh fruits and vegetables transfer these to the fridge for up to a week once your preferred level of carbonation has been achieved. Kombucha flavoured with less perishable items can be kept for up to three months like unflavoured kombucha but as I mentioned above I always drink mine much faster!
SCOBY hotels
A SCOBY hotel is the name commonly given to a big jar that is being used to store spare SCOBYs. If you are brewing regularly then your original SCOBY will keep growing layers. There’s no immediate harm to keeping these in your brewing vessel but over time if the SCOBY gets too thick it can prevent oxygen getting to the tea and increases the likelihood of something going wrong. You can of course remove these extra layers and just throw them away, add them to your compost or even turn them into a face mask (this is still on my list of things to try) or, you can create a SCOBY hotel so that you have a SCOBY and starter tea ready to go as and when you decide you want to try experimenting with new flavours or if (god forbid) your main batch gets spoiled by mould.
To make a SCOBY hotel remove your SCOBY from your brewing vessel. To do this either use clean hands or a clean set of tongs and place on to a clean chopping board. Peel off the additional layers that you are going to move to the hotel. Add some of your current batch of kombucha to the jar along with more sweetened tea. (Essentially you are making up the basic ‘Unflavoured Kombucha Recipe‘). Your SCOBYs can live in this week for 6 weeks+. It is recommended that you regularly replace the liquid with new sweetened tea to prevent infection or the SCOBYs dying.
The normal rules apply e.g. cover with cotton cloth, keep it warm enough and out of direct sunlight etc. The SCOBYs you add to the jar will continue to grow more.
Frequently asked questions
These are just some of the questions friends have asked me during my kombucha brewing journey. If you have any questions you’d like me to answer then send them in the comments!
Do I need to sterilise all of my equipment?
Giving your brewing vessel, utensils, and bottles a good clean before using them is of course good hygiene. You don’t need to buy any specialist sterilisers, good old fashioned soapy water will do!
Where should I keep my kombucha while it is fermenting?
Your brewing vessel should be kept out of direct sunlight but otherwise it can sit on a counter top quite happily.
Should my SCOBY float?
SCOBY’s have a mind of their own. Sometimes they sink, sometimes they float and sometimes they kind of hover in the middle looking a little lopsided.
I ripped a hole in my SCOBY when moving it, have I killed it?
No you haven’t! SCOBYs are very robust and it’s not uncommon for them to get ripped when you are peeling them apart. A new SCOBY will almost always form in a perfect circle (presuming your brewing vessel is circular) but it doesn’t matter in the grand scheme of things!
What are these weird brown stringy bits?
The most “alarming” thing to appear in most batches of kombucha are these odd brown (or sometimes brown/green) stringy looking clumps. I’ve sometimes heard these referred to as “ooglies” or “uglies”. They are are usually found clinging to the underside of your SCOBY and will eventually die and fall to the bottom of your brewing vessel. These weird stringy brown things are not only harmless, they are actually vital to brewing kombucha. They are the “Y” in SCOBY; they are strings of yeast. Without these weird brown stringy things you wouldn’t have kombucha’s signature flavour or the fizz! So do not panic if you see theses form.
Is it normal for there to be lots of bubbles/foam?
Foamy collections of bubbles might form around the sides or underneath of your SCOBY. This is perfectly normal and is usually seen when you also have quite a few brown stringy clumps of yeast. Bubbles also sometimes get trapped when a new SCOBY is forming. This can often make the new layers of SCOBY look a little strange but it is nothing to worry about! They SCOBY will form over these and they will dissapear in no time.
My SCOBY is white/cream/grey/beige/pink/peach/brown, is this normal?
SCOBYs come in a wide range of weird and wonderful colours. Black tea is notorious for producing darker SCOBYs whereas green tea and white tea will produce a SCOBY that is much more milky in colour. New SCOBYs are also often paler than their older counterparts. In my SCOBY hotel I have SCOBYs in all sorts of different colours and shades. When SCOBYs get really old and dark I tend to get rid of them and just keep the freshest ones. Provided the colour is not being caused by anything fuzzy or fury (see below) you should be fine!
My SCOBY has patches of fuzzy/furry stuff (aka mould), can I drink it?
Mould on your brewing vessel or SCOBY is a bad sign I’m afraid. In fact, fuzzy mould means your batch is ruined and it’s got to go down the drain and the SCOBY in the bin. This is why I’d recommend keeping a SCOBY hotel if you can because those spare SCOBYs and the starter tea will come in incredibly handy if you have to get rid of your main batch.
How much kombucha is safe to drink?
I’m not a nutritionist so I can’t really advise. But with any fermented food it can be a little harsh on your gut if you’re not used to it. A glass in the morning shouldn’t be too much to handle but just listen to your tummy! Everyone is different.
Where can I find out more information?
I am a member of a fantastic Facebook group that was super helpful when I was first starting out. It’s a UK based group but there will no doubt be more local groups if you do a search.
This is such a superb Kombucha post, I love how comprehensive it is, you’ve covered every question I would think to ask and many more besides. I find kombucha fascinating, it kind of seems like this combination of food fermentation techniques (like when you make kimchi) and alcohol brewing techniques (with the yeast). Really interesting to read!
That is a GREAT way of summing it up – Jon has certainly used his brewing knowledge to help me troubleshoot along the way. (I’m sat here sipping a pineapple kombucha right now :D)
How can I preserve SCOBY for next batch?
If I want to give few days or weeks gap before brewing next batch, what is the best way to preserve the SCOBY?
You should always make sure you have reserved some of the liquid for your next batch too. Provided that you are keeping the SCOBY in the reserved liquid you can wait a week or two to brew with it.