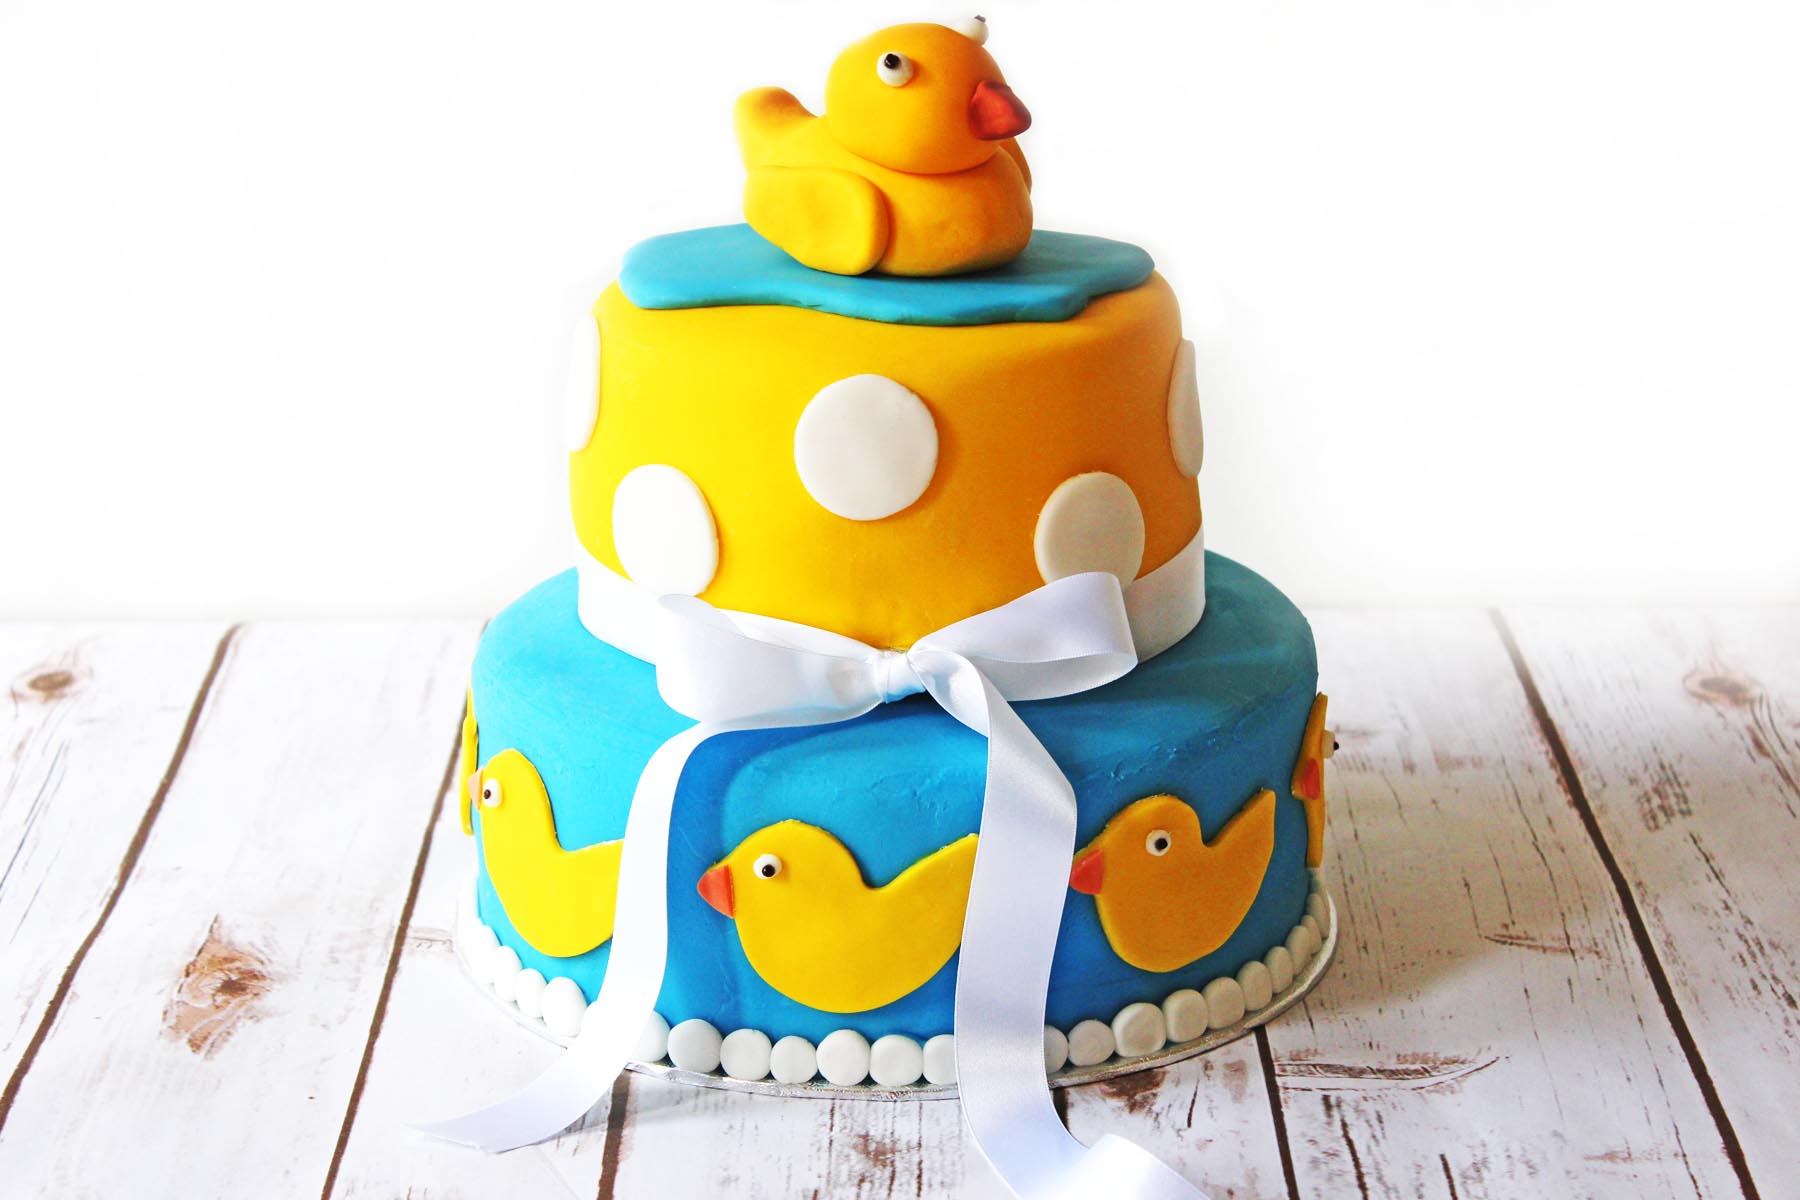
I used my two tier celebration cake recipe to make this show stopping Rubber Duck themed cake for my friends baby shower. Find out how you can make it too by following the instructions below.
Rubber duckies
I don't know how I get myself into these sitautions. Remember the 3D Beehive Cake that I made for my Godson's 1st birthday, complete with honey drips and buzzing bees? Well, in just a few months my Godson will have a little brother or sister!
He loved his birthday cake so much that when the baby shower came around, his aunty asked if I would bake another cake this time for the baby shower. I was honoured and agreed on the spot.
My friend and her husband are absolutely obsessed with rubber ducks! I can't begin to count how many they have stashed all over their house! So, it was no surprise when they nicknamed their newest arrival as "duckling" at the start of their pregnancy.
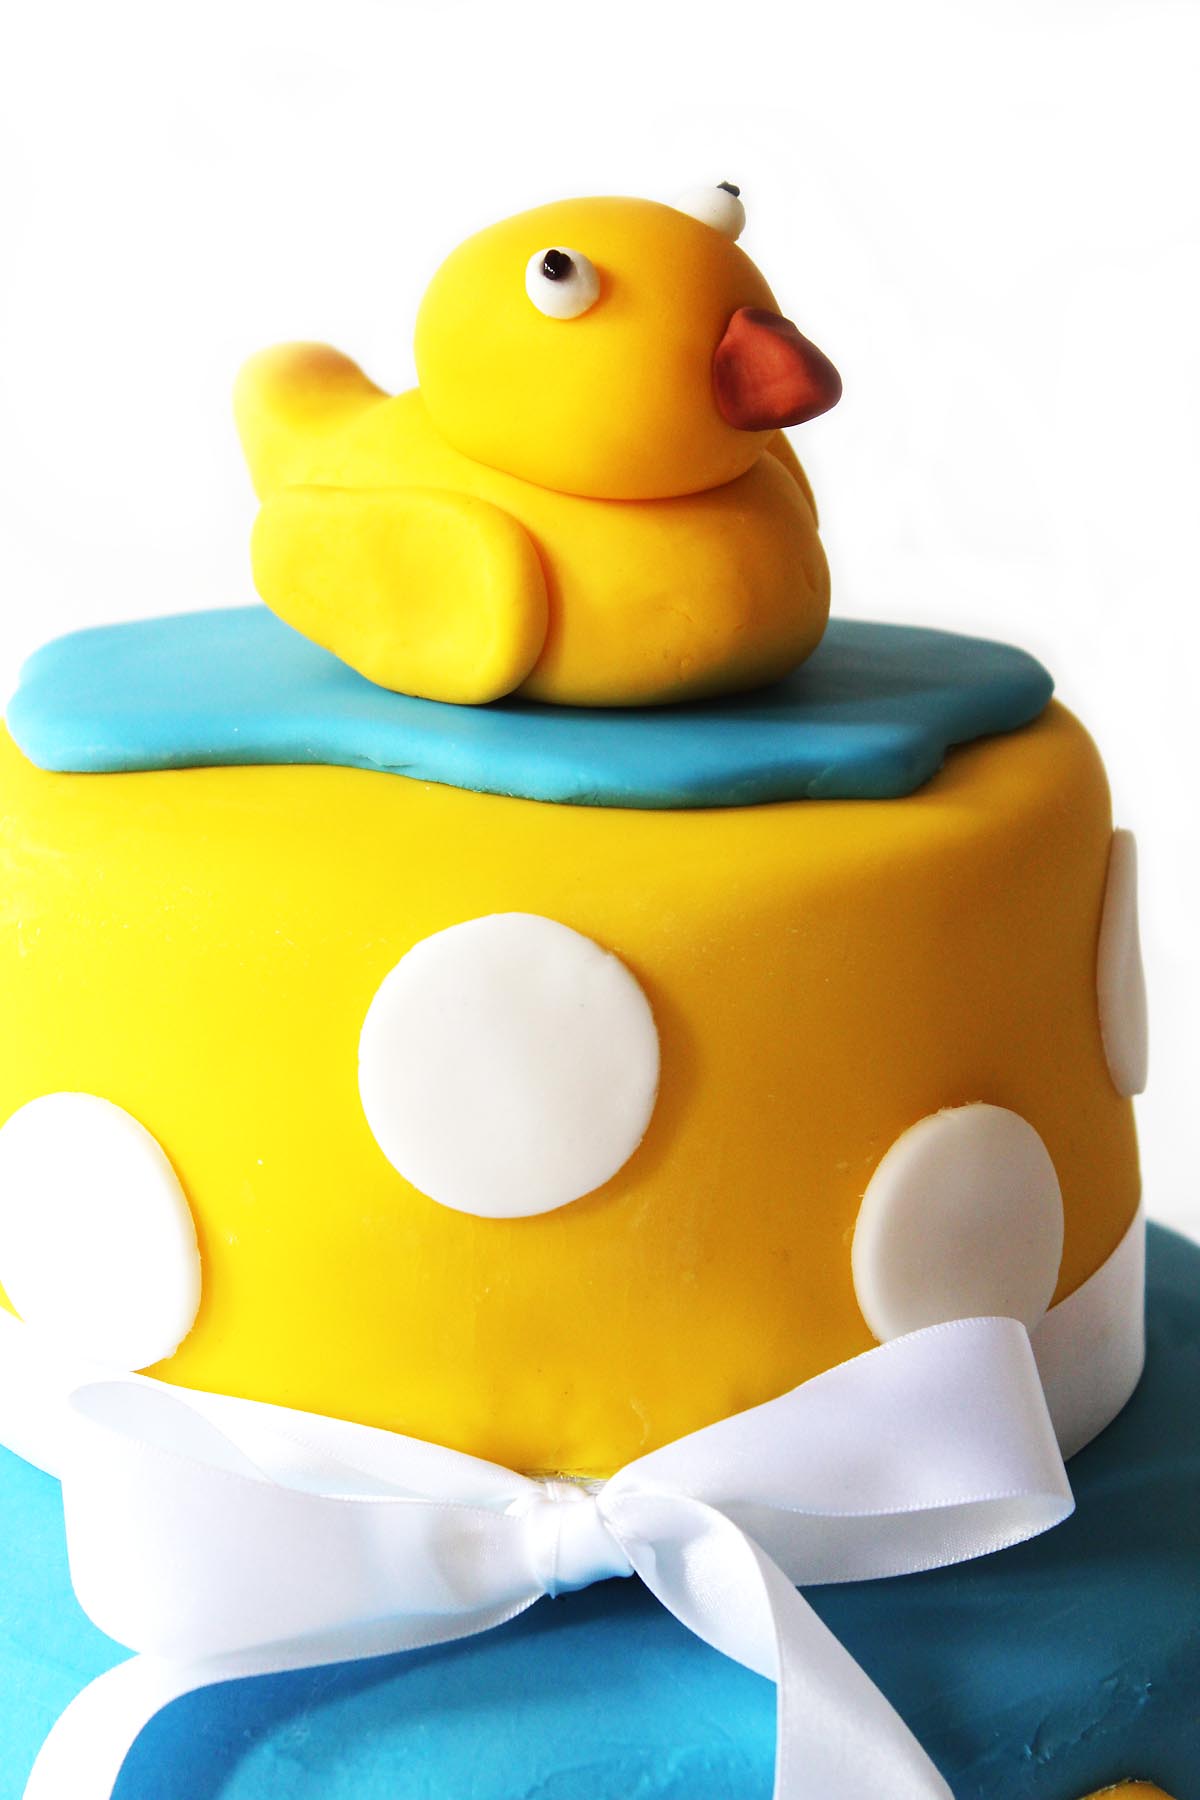
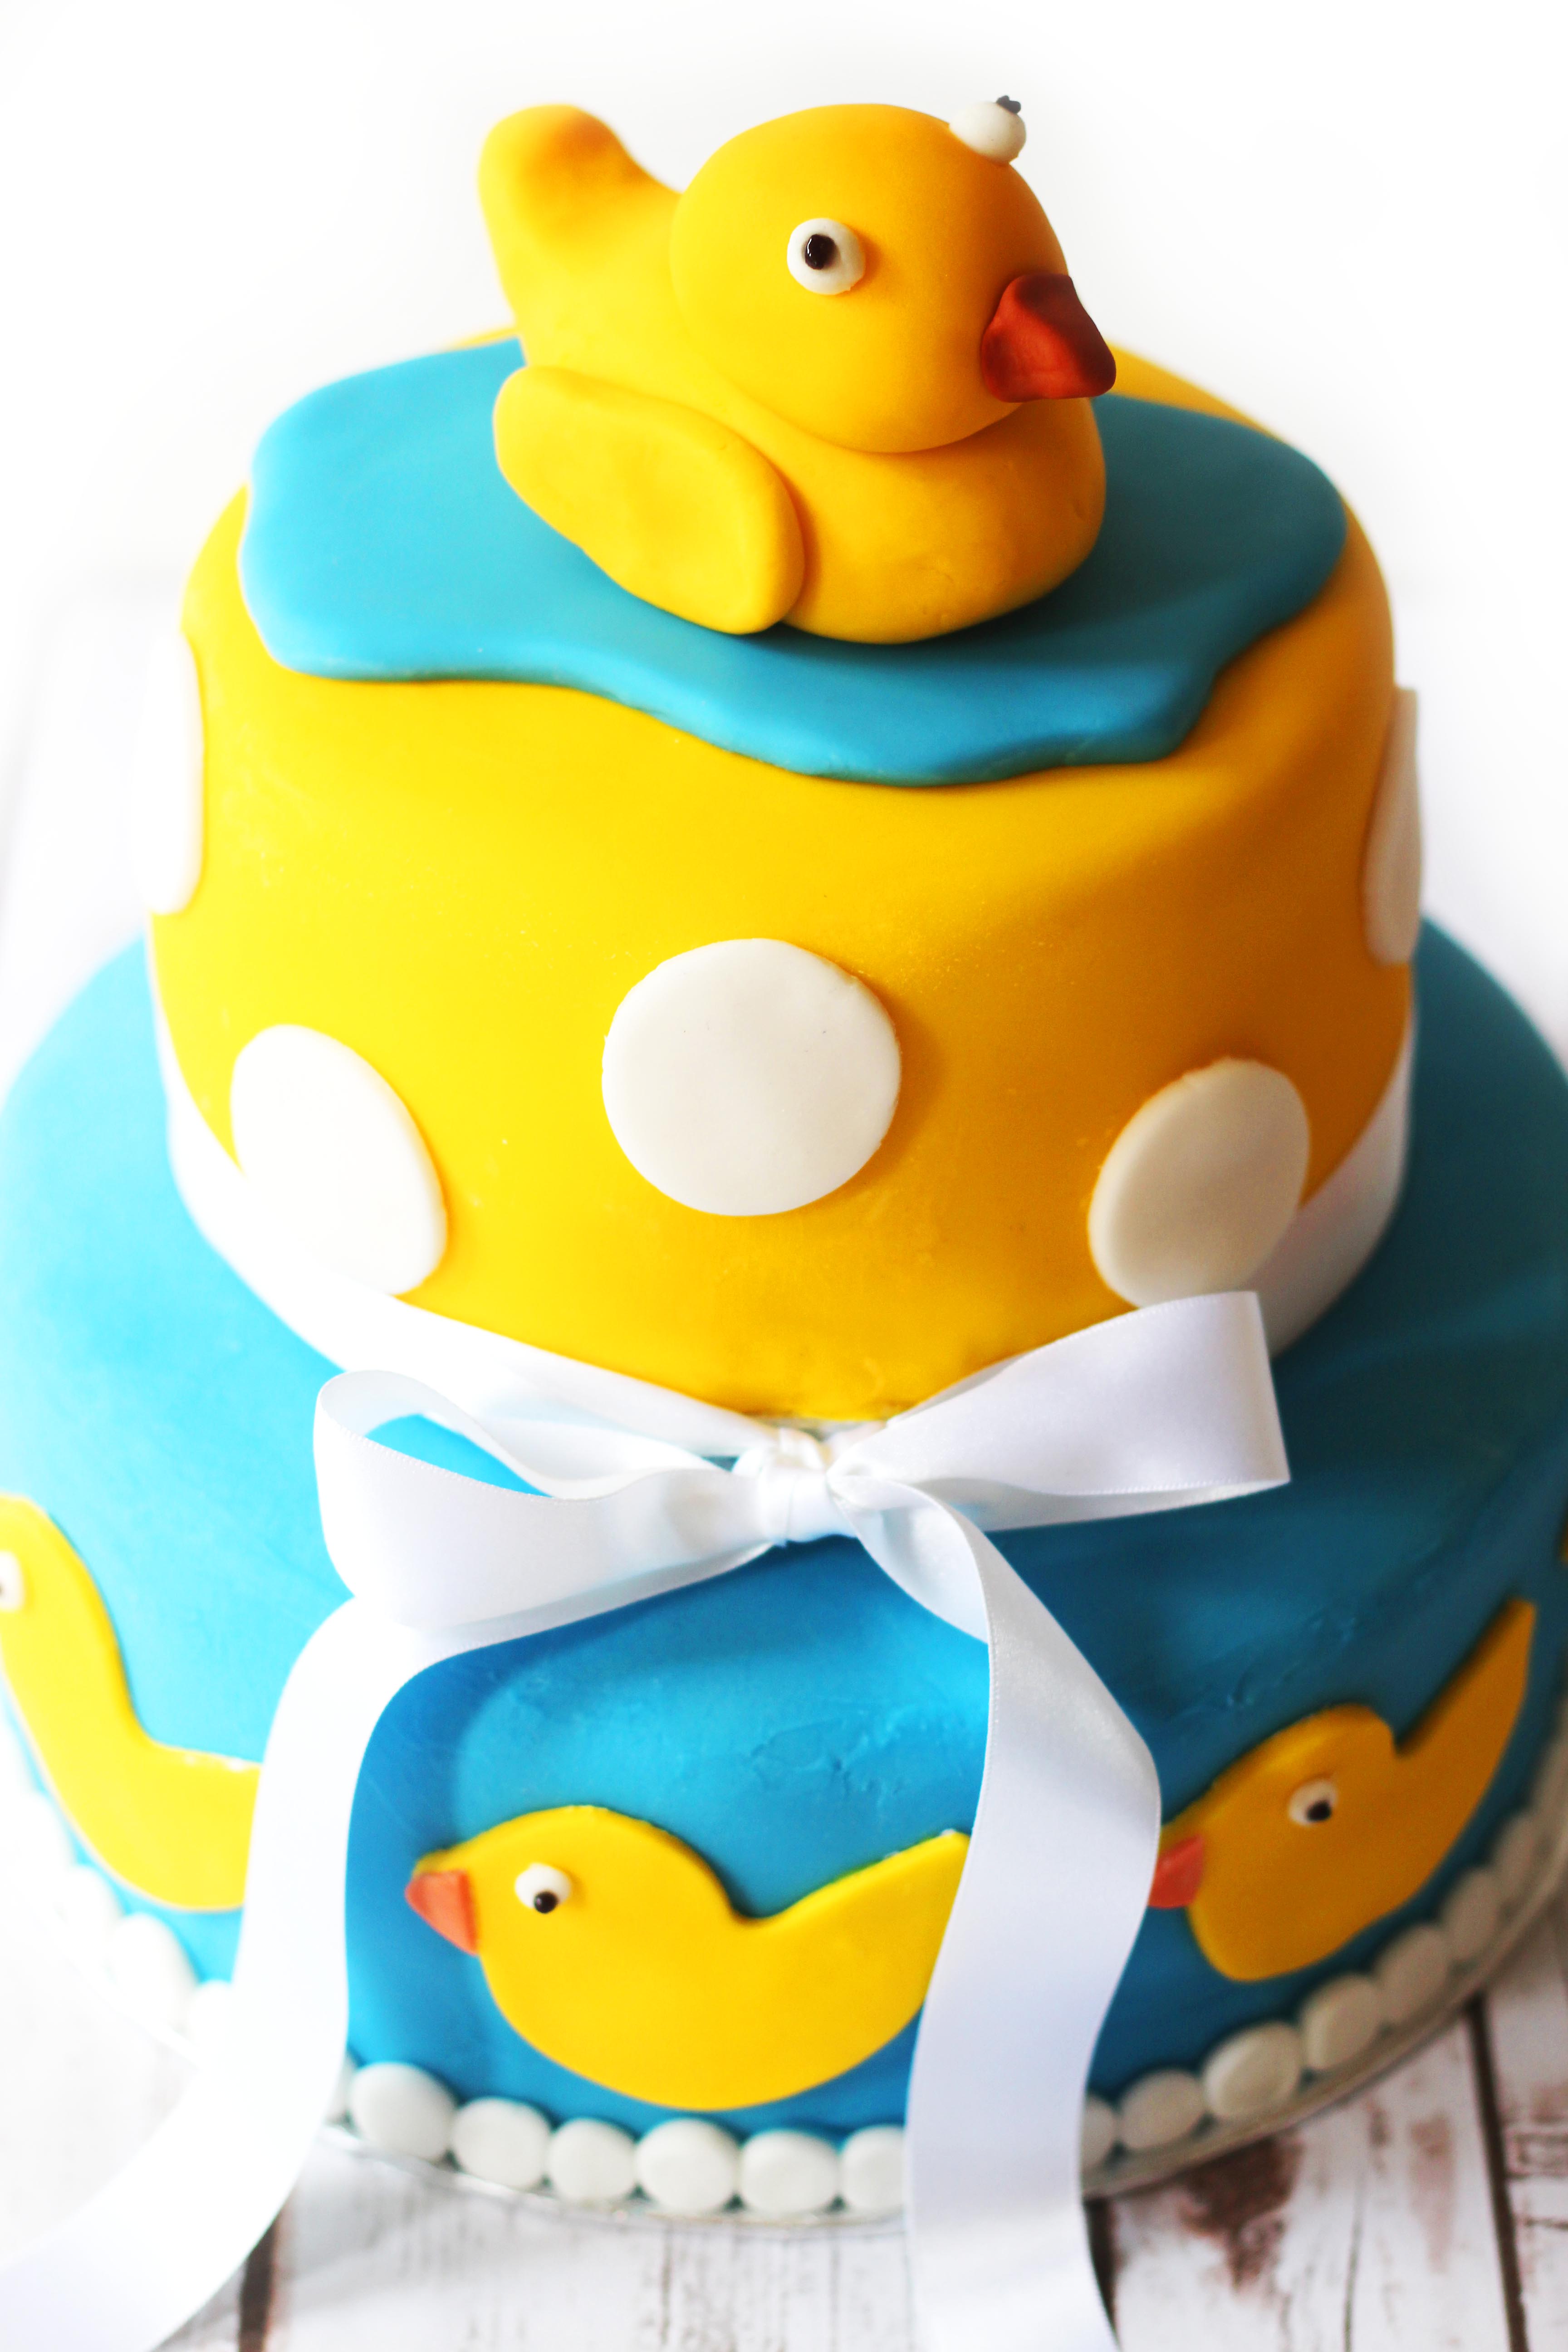
I knew that the baby shower cake had to have a rubber duck theme. After hours scrolling through Pinterest I saw a couple of designs I liked and decided on a blue and yellow theme with white accents and a 3D rubber duck on top.
There were some elements that made me nervous - for a start I'm still not super confidant with rolled fondant. Nor was I confidant about modelling a 3D rubber duck! But, the bee's had turned out fine on my last cake hadn't they? It was certainly worth giving it a go.
Bubbles
I got a bit carried away when designing the original cake. I'd seen gelatin bubbles used for Christmas snow globe cupcakes and thought the same technique could work here. Unfortunately I had just one day to get the cake baked, iced and decorated so the gelatin bubbles had to go.
Instead, I made the little bubbles round the base out of white fondant. I thought this matched up well with the bigger white circles (polka dots) on the top tier.
Sometimes we all have to admit we are good, but not that good. So, you'll have to wait a little bit longer before I attempt a decoration as tricky as gelatine bubbles.
Two tier celebration cake
You'd be forgiven for thinking this post wasn't a recipe post at alas I've just talked about the decorations! But, it's important to me that a cake tastes as good as it looks (if not better!)
I made a lemon sponge last time which was delicate and moist. I thought about doing a chocolate cake but if I was using rolled fondant then I didn't want the flavours to clash. I stuck to trusty Madeira adding lots and lots of vanilla. I then sandwiched the layers together with strawberry jam and buttercream. It's a classic combination that works every time.
If you're after a simple recipe for a two tier celebration cake then you are in the right place. I spent hours doing the math to make sure I had enough cake mix to fill a 6.5inch tin and a 9inch tin. By using a 6.5inch tin for the top tier it would be big enough to balance the rubber duck on top, but not so big that it swamped the lower tier.
If you don't have a 6.5 inch tin (rather a 6 or a 7 inch) simply adjust the cooking time and keep a close eye on it!
The recipe
Two Tier Celebration Cake for Baby Shower
Equipment
- 2 x 6.5" circular cake tins
- 2 x 9" circular cake tins
Ingredients
For the cake
- 700 g butter
- 700 g caster sugar
- 12 eggs
- 700 g self raising flour
- vanilla paste
For the filling
- 1 jar strawberry jam
For the buttercream
- 300 g butter
- 600 g icing sugar
- milk
Instructions
To bake the cake
- Preheat your oven to 180C (or gas mark 4).
- Line two 6.5 inch cake tins and two 9 inch cake tins with grease proof paper.
- Beat together the butter and sugar in a large bowl (or 200g of each in a medium bowl for the 6.5 inch cake and 500g of each in a large bowl for the 9 inch cake) until smooth and creamy.
- Add 1 egg at a time, beating until well combined and fluffy. (For the 6.5 inch cake use 4 eggs and 8 eggs for the 9 inch cake.)
- Next, gently fold in the flour along with 2 teaspoon of vanilla bean paste (200g of self raising flour for the 6.5 inch cake and 500g for the 9 inch cake. Use 0.5 teaspoon of vanilla bean paste in mix for the 6.5 inch cake and 1.5 teaspoon for the 9 inch cake.)
- Divide the mix between the cake tins trying to make sure they are level.
- Bake in the centre of the oven for 25-30 minutes (6.5 inch cake) / 35 - 40 minutes (9 inch cake) until the cakes are golden and springy to the touch.
- Leave to cool slightly before turning out on to a cooling rack to cool completely.
To fill and decorate
- Beat the 300g butter in a bowl until light and fluffy.
- Sieve in the icing sugar and mix well being careful not to over beat the icing mix.
- Stop when the buttercream is smooth and not at all grainy.
- Carefully stir through a teaspoon of vanilla paste.
- Spread a little buttercream onto each of your cake boards.
- Place your bottom layer of each size cake on to the appropriate cake board.
- Pipe a ring around the top of each cake. This will create a dam for the jam.
- Spoon the jam on top of the cake up to the piped buttercream ring.
- Take the second layer of each cake.
- Spread the bottom with a little buttercream and place on top of the bottom layer.
- Push down firmly (a little buttercream may push out the sides).
- Using a spatula spread any excess buttercream around the sides of each cake.
- Mix a little milk into the buttercream to make it more spreadable.
- Using a spatula, spread a thin layer of butter cream over both cakes to catch any crumbs.
- Place in the fridge for 30mins until the layer of buttercream has formed a crust.
- Again using a spatula, spread on a thicker layer of buttercream on each cake. Try to keep the edges as flat as possible and create a sharp edge between the sides and top of the cake.
- Place in the fridge after each layer has firmed up and repeat until you have used the buttercream.
- Keep the cake in the fridge overnight (or for at least 2 hours) before attempting to cover in fondant.
To cover with fondant
- Dust your work surface and rolling pin with a mixture of cornflour and icing sugar. This will stop it sticking.
- Knead the blue fondant icing until it is soft and pliable.
- Roll out the fondant icing on your work surface. Keep rotating the icing regularly so that it rolls out in an even circle and doesn’t stick.
- Once it has been rolled out large enough, drape it over your rolling pin.
- Carefully lift the fondant and place it on to your cake.
- With one hand, carefully life up any pleats or folds , with the other hand smooth the fondant so that it sits flat against the cake top and sides.
- You can use your hands or icing smoothers to make sure the icing is really flat and any edges are crisp.
- Once you are happy, use a sharp knife to trim any excess
- Repeat the steps above with the yellow fondant to cover the second cake.
To decorate
- Use the excess fondant and white fondant listed to cut out rubber ducks and bubbles. Decorate with orange and black icing for the eyes and beaks.
Nutrition
Time to decorate
The recipe above will get you 2 separate cakes made of super moist sponge, filled with jam, and covered with buttercream.
You're probably wondering what you need to decorate the cake!
Ingredients/tools
- 1.25kg pale blue fondant icing
- 1kg yellow fondant icing
- 250g white fondant icing
- 25g orange fondant icing (or use your white or yellow icing and add orange food colouring and knead well)
- Black writing icing
- Hollow plastic cake dowels
- Rubber duck cookie cutter
- Circle cookie cutters, small medium and large
- 1m White Ribbon
It sounds like a lot of icing and it is!
Covering round cakes with fondant
Save roughly 100g of the blue fondant for the top of the yellow cake. The remaining icing should be used to cover the bottom tier.
Save roughly 250g of the yellow icing to make the rubber ducks. The rest should be used to cover the top tier.
- Before attempting to cover your cakes with the fondant make sure they have been in the fridge, covered in buttercream, for at least 2 hours so that a crust has formed.
- Knead the fondant icing until it’s smooth and pliable. This could take up to 10 minutes but will prevent cracking and elephant skin.
- Roll the fondant into a ball. Make sure it's as spherical as possible which will help you roll it out into a perfect circle.
- Using a piece of string measure both sides of your cake and across the top. This will tell you how wide you need your rolled fondant to be. Add an extra 2 inches to make sure it is plenty big enough.
- Either using a silicon rolling mat, or a work surface dusted with a mix of icing sugar and cornflour, roll the icing out into a circle wide enough to cover your cake.
- Carefully roll the icing onto your rolling pin, then unroll it on the cake. I like to make sure I can see that the icing is hanging over the front of the cake a little before draping it over.
- Start by smoothing the top of the cake then gently smooth down the top inch of the cake first.
- Lift up any pleats that form and gently smooth down.
- Trim the excess icing then using a cake smoother, press it evenly across the top of the cake to push out any air bubbles.
- Repeat and again trim any excess icing.
Adding embellishments
There's not a lot of magic to the decoration of the two tiers.
For the top tier simply roll out your white fondant, and cut out small circles using a cookie cutter. You can then stick these to the cake using water, edible glue, or a paste made out of a little fondant mixed with some water (aka gunge). Roll out blue fondant and free cut into a puddle shape. Mould a 3D duck out of the yellow fondant, using white fondant for eyes and orange fondant for a beak. These elements can be stuck to the duck's body with edible glue, water or gunge.
For the bottom tier: roll out your yellow fondant nice and thin; use a duck shaped cookie cutter to cut out the ducks; roll little eyes out of the remaining white fondant and stick these to the ducks with a little water, edible glue or gunge. A little black writing icing can be used to make the dot in the eyes and a little orange fondant can be shaped into a beak. Again, the beak can be stuck to the duck with water, edible glue or gunge. Let the black dots of the eyes dry and make sure the beak and eyes are firmly attached before sticking the ducks to the cake. For the bubbles round the bottom roll balls of white fondant, add a little water, edible glue or gunge around the bottom of the cake and push the balls on to the cake.
Stacking your tiers
The most nerve wracking part of the process is stacking the two tiers but its not as hard as it looks!
Simply take your dowel and cut four pieces so that they are just millimetres taller than the bottom tier. To make sure your top tier sits flat make sure all four dowel are the same height. Gently push the dowel into the cake roughly 1 inch from the edge of the base of the top tier.
Place the top tier on top and finish with a ribbon.

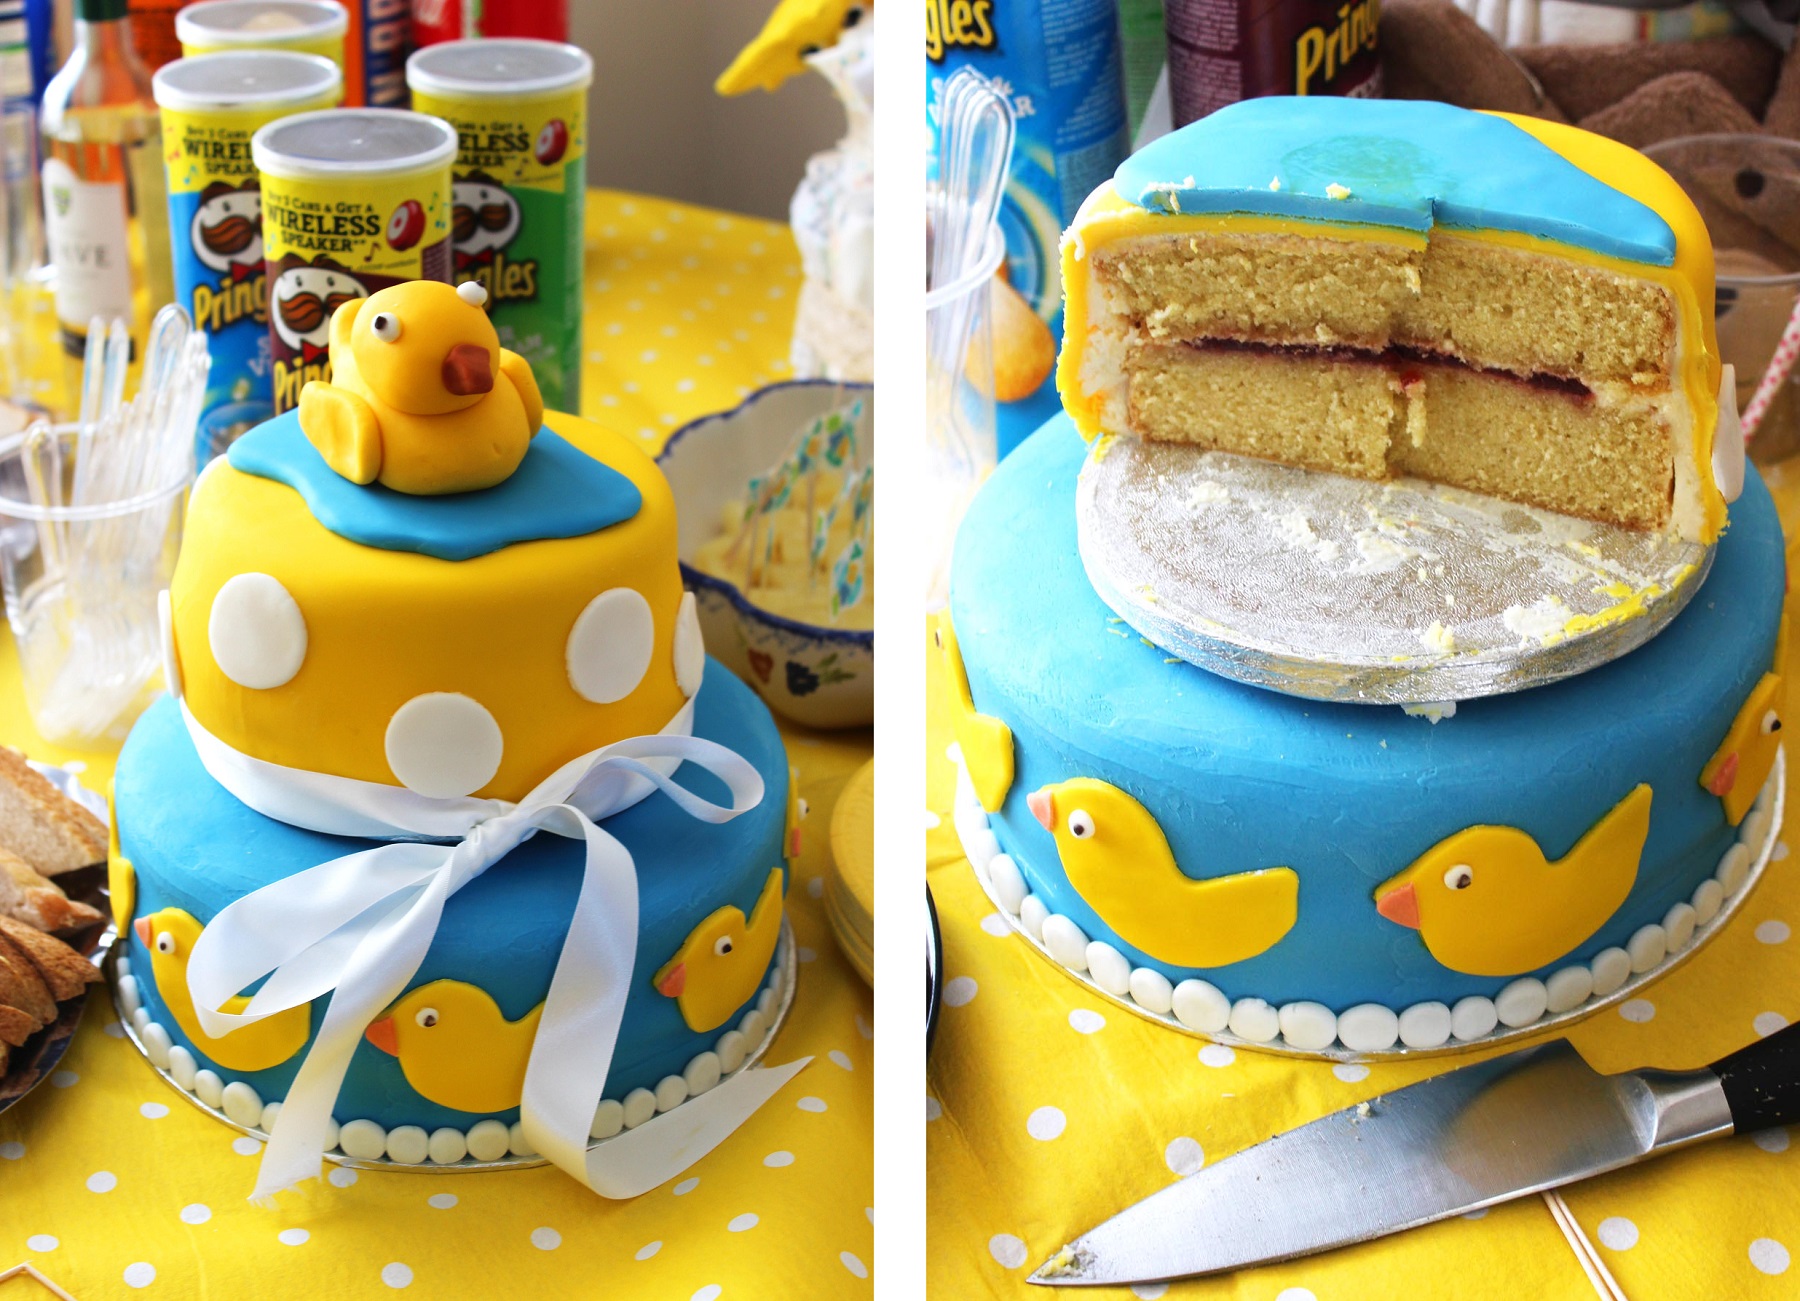
The cake in action
I couldn't leave this post without sharing pictures of the cake at the party! It was a bit stressful driving the cake up there. Our friends live about an hours drive from us and every time we went round a corner I could hear the top tier sliding.
Luckily it only took a couple of knocks. What was meant to be the front quickly got relegated to the back but I don't think too many people noticed.
I was relieved when we finally got to cut into it. There was a good helping of jam and the cake was delicious and moist! I was so pleased.
An alternative
If you're not yet brave enough to go for a full two tier creation. You could simply do one tier. The bottom tier is surprisingly easy!
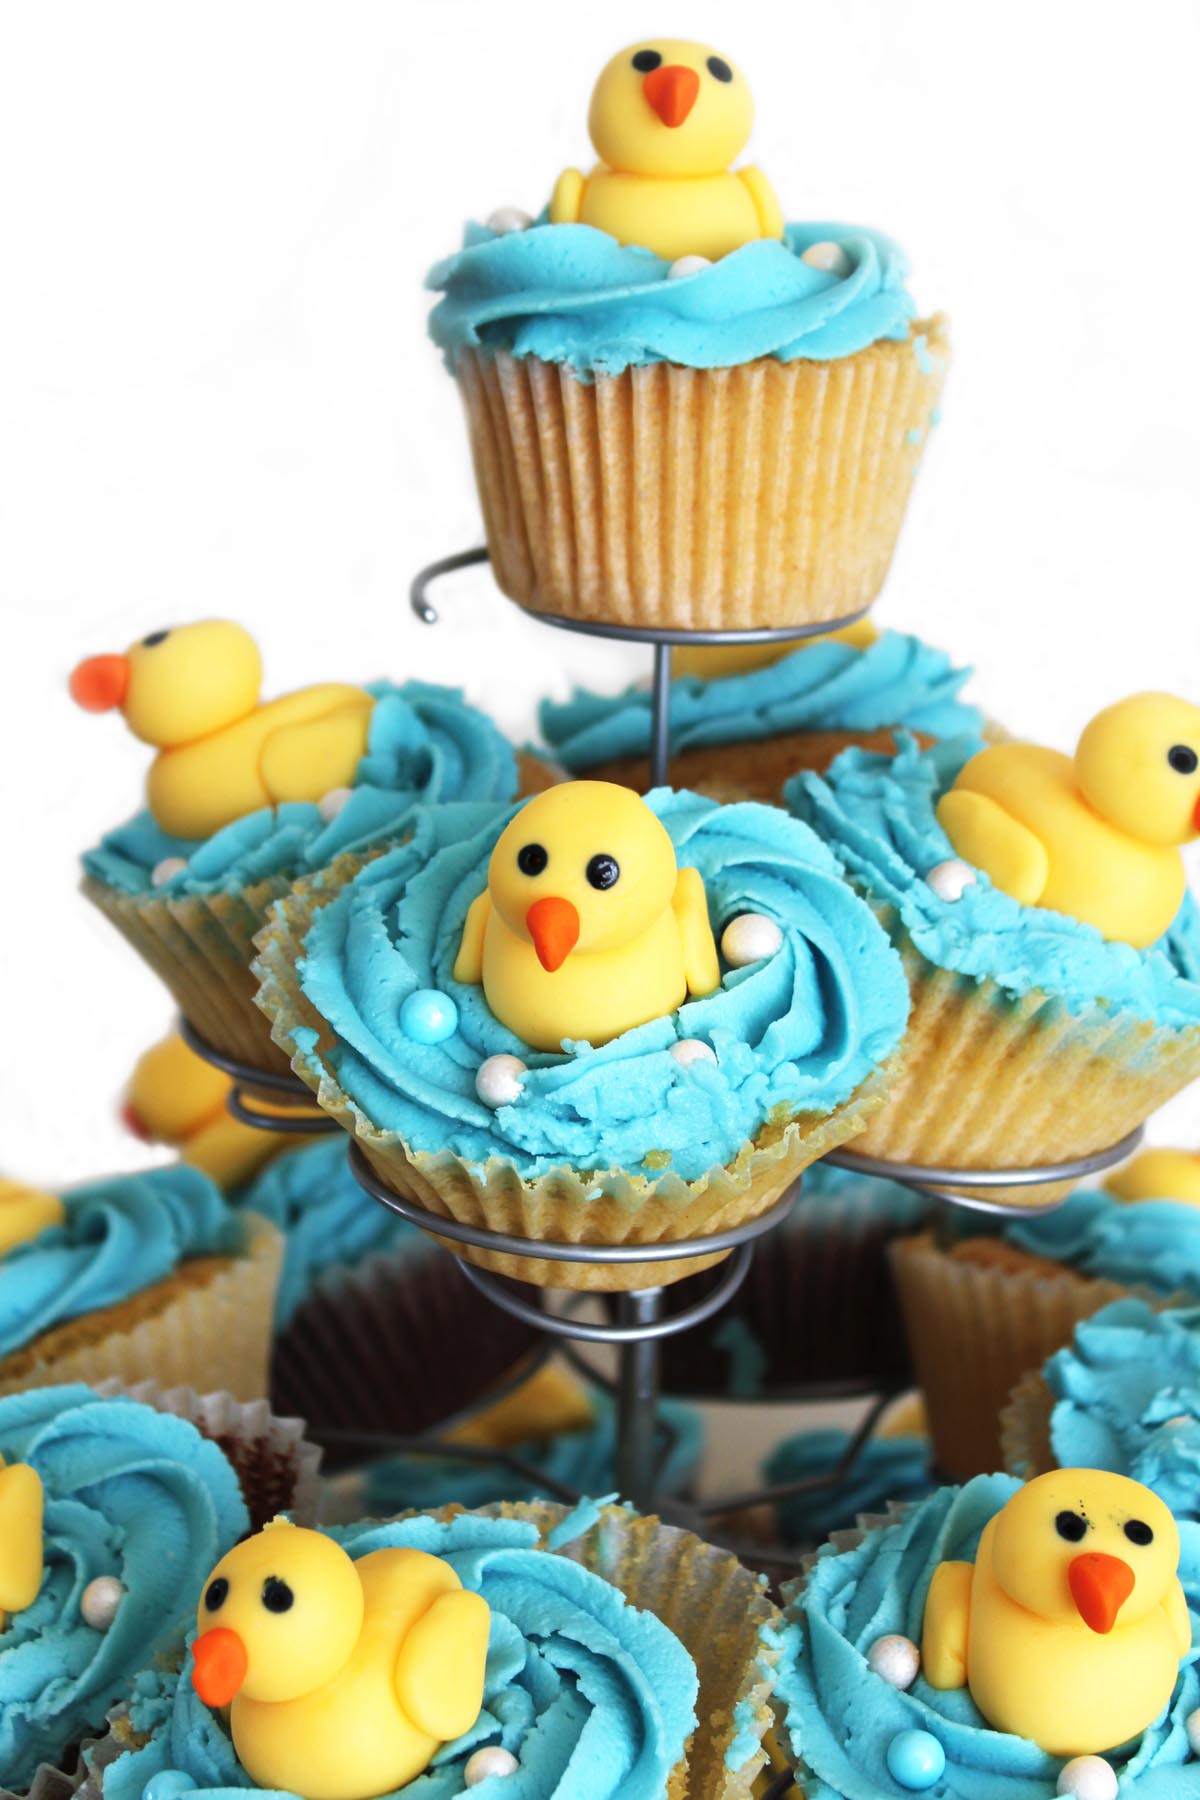
Or, why not make these adorable cupcakes. I can't take credit for them as another friend made them but all you will need is a fairy cake recipe some blue butter cream and yellow fondant to model the ducks! Black writing icing will be perfect for the eyes and orange fondant for the beak. A few sugar pearls make great bubbles.
Choclette says
Emma, I am in awe! You are definitely the best cake modeller I know. How nice to be asked for such an important event. Well done.
Emma Walton says
Oh bless you Choclette, you are really sweet! It's certainly one of those things where practice makes perfect - if I get asked again hopefully it will be even better next time!
Claire @foodiequine says
This is amazing!!! I wouldn't even know where to start so I bow down to your cake making expertise. Think you'dd be making many more cakes for your nieces and nephews in the coming years.
Emma Walton says
Thanks Claire, I was winging it a little! I have 6 nieces and nephews (for the time being) and lots of friends with little ones so I could be busy!!!
Jemma says
This is so adorable. I'm so jealous of your baking and decorating skills too.
Emma Walton says
Thanks Jemma, it's far from perfect but I'm very proud of what I achieved!
Cliona Keane says
This is amazing! Now I just need a friend to have a baby so I can make it...!
Emma Walton says
Haha Cliona I'm sure you can be very persuasive 😉
Amy | The Cook Report says
This is so cute, you're so talented!
Emma Walton says
You're too sweet! Thank you.
Ginny says
What a darling cake! Your instructions are perfect for such an involved cake. Great! I also love how you've got that layer of jam in there. Delicious!
Emma Walton says
Thanks Ginny! I really wanted it to be a classic cake. Vanilla sponge, strawberry jam and buttercream really hit the spot!
Beth says
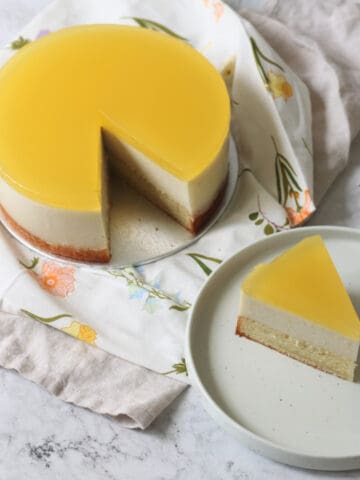
You are very talented! I love this! I love the lemon sponge cake too!
Hannah Healy says
Wow! You did a wonderful job on this beautiful cake. Congrats on such a wonderful masterpiece.
Emma Walton says
Thank you so much Hannah!
Fiona says
A beautiful looking cake. I'm inspired to give this a go as your recipe looks quite easy to follow.
Emma Walton says
Thank you so much Fiona. Please do send in pictures if you do!
Sara | mumturnedmom says
This is awesome! Beautifully done. I love decorating cakes and I'm always looking for inspiration, so I've pinned this 🙂
Emma Walton says
Thanks Sara! That's lovely to hear.